Since the country has gone into lockdown the beetle has been on hold. Unfortunately a couple of weeks before it all kicked off I had packed up the garage ready to move house so no chance to progress the car.
Moving house finally came and the T4 got put to use as an actual van, luckily I had just enough time to finish the rock and roll bed so I had a fold down seat to improve space in the back.
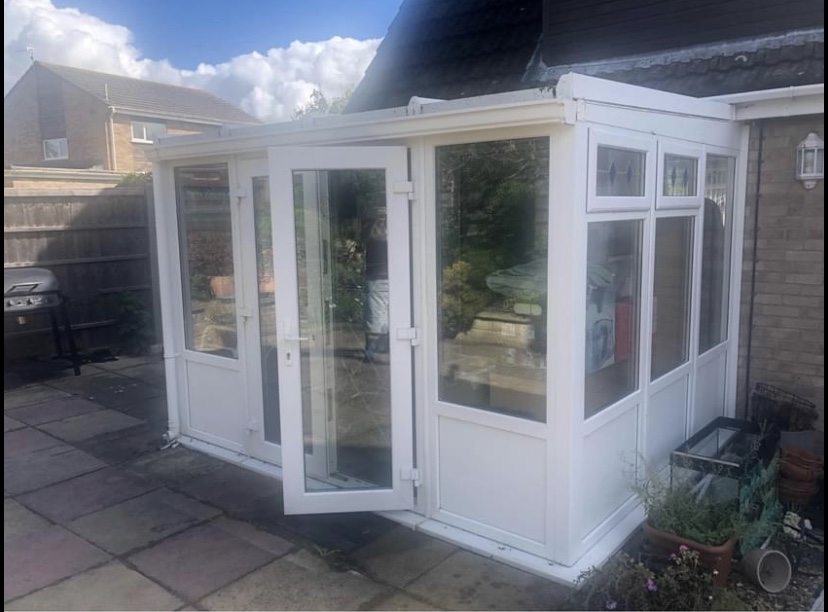
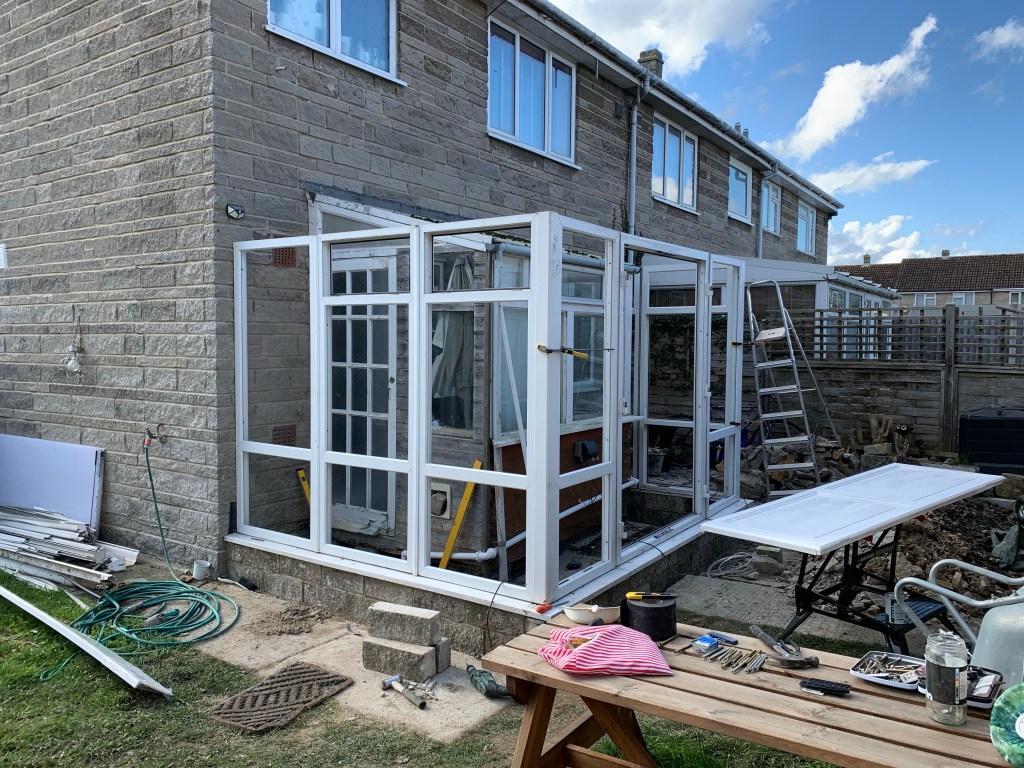
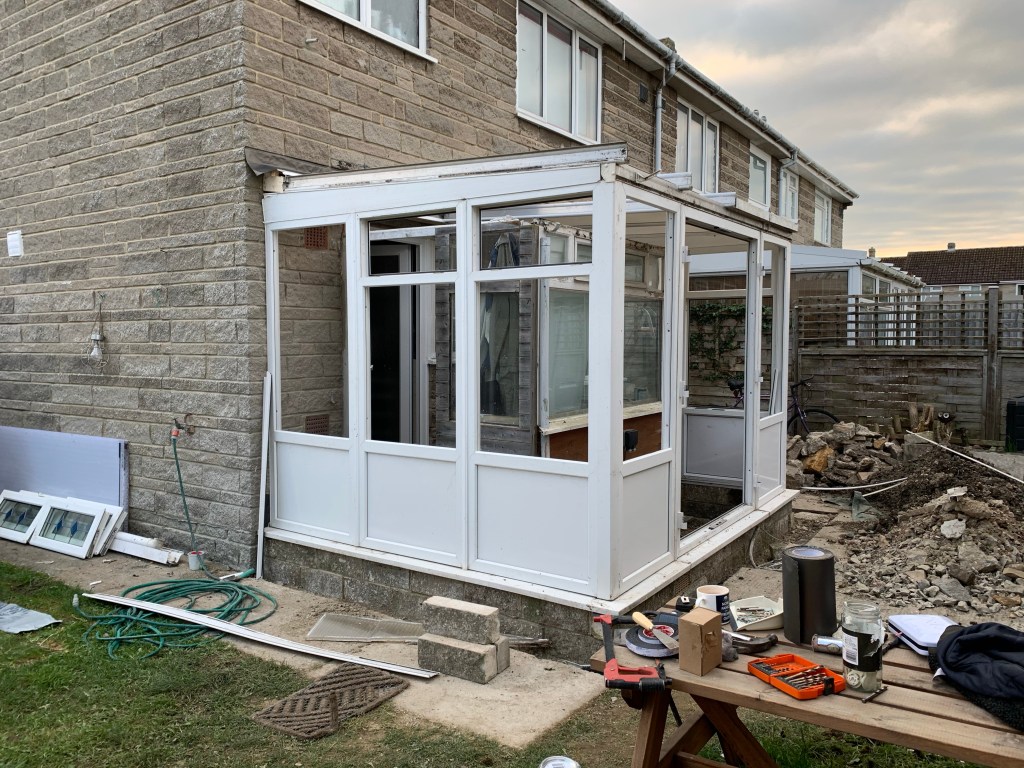
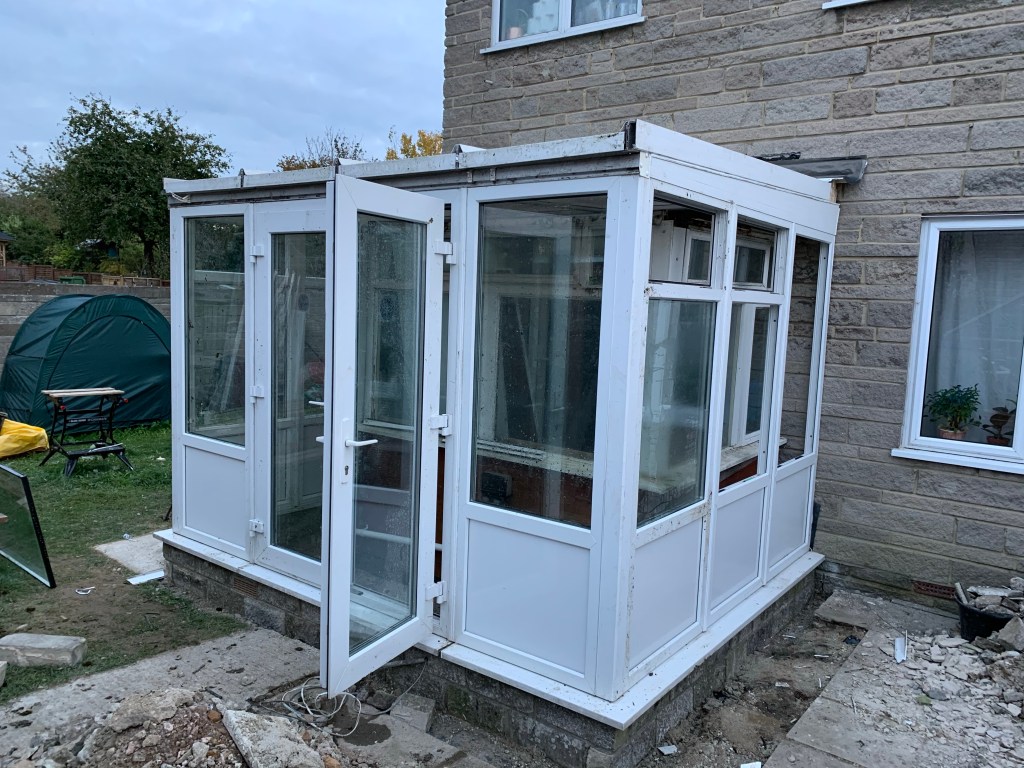
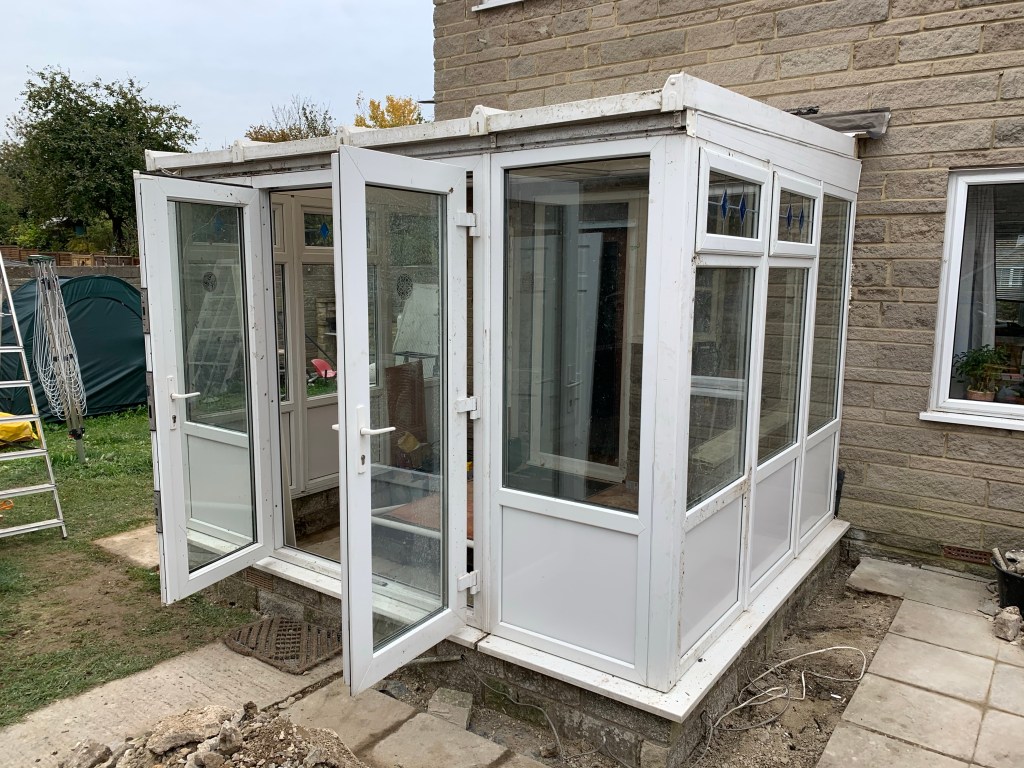
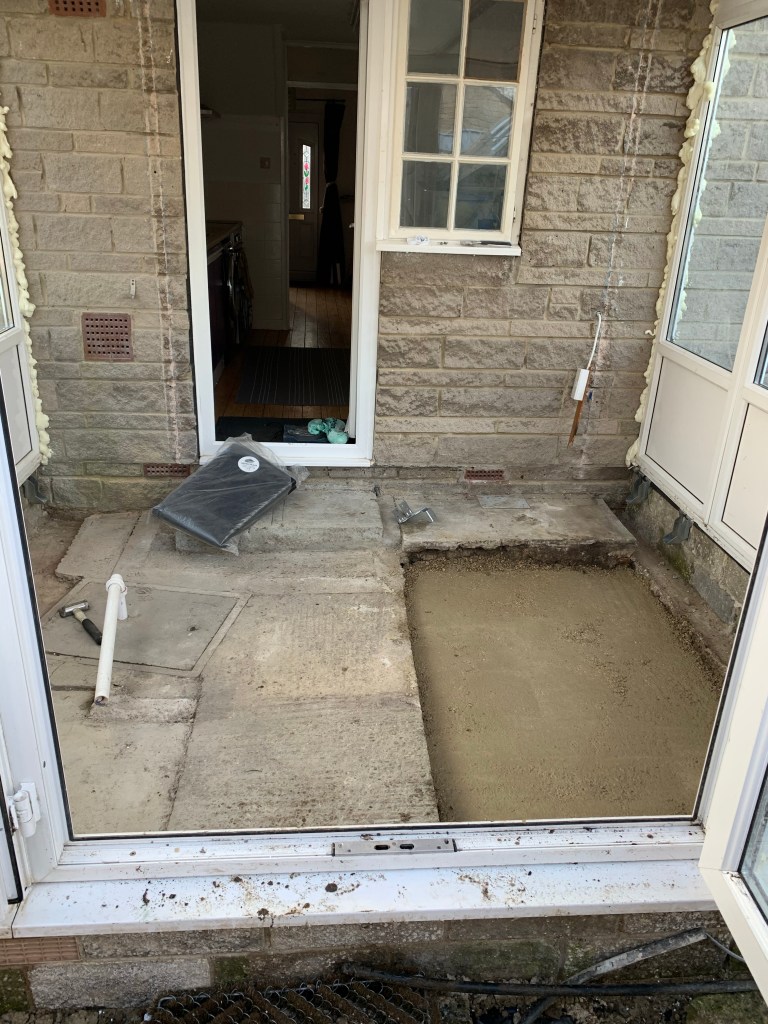
This gave me a chance to replace the wooden shack/porch at the back of my new house. Since I don’t have any money I managed to find a conservatory online for free but I had to dismantle and collect it myself. So this page is dedicated to dismantling, moving and rebuilding my conservatory.
The conservatory is a lean to full length frame example about 8ft by 10ft so it’s a basic item which makes it easy to rebuild.
The owner just lived about 50 minute drive away so a date was decided for collection.
Sorting through the mess that is my garage at the moment I got all the tools I needed:
- Step ladder
- Screw driver (electric)
- Torx driver (T30 bit)
- Small socket set (8mm socket)
- Paint scrapper
- Soft face hammer (nylon face)
- Craft knife (long blade)
- Big flat head screw driver
Conservatories are pretty simple items so taking apart is very easy. So on the collection day I was hopeful of a straight forward task.
Typically a storm had hit with high winds and heavy rain!
I pull out my waterproofs and set off.
Step 1: Have a plan. Looking around the conservatory I needed to work out how I’m dismantling and storing/loading the items. My T4 won’t take everything in one go so I’m going to leave parts so I need the space to move parts around as well as load parts. Luckily the garden was big and I had plenty of room.
Step 2: take out the windows. It’s raining so I’m leaving the roof in as long as possible so I focused on the windows. The top windows open so they came out first. Three screws each side releases the hinges and out they came with a little bit of manipulation. As usual some screws were cross threaded so using a big flat head screw driver for a bit of leverage the screws would undo. One of the windows was still locked and there wasn’t a key so out came a couple of instrument screw drivers to quickly pick the lock. These locks are very simple and didn’t pose much of a problem. The big windows are standard double glazing items so they are easy to remove if you know the trick.
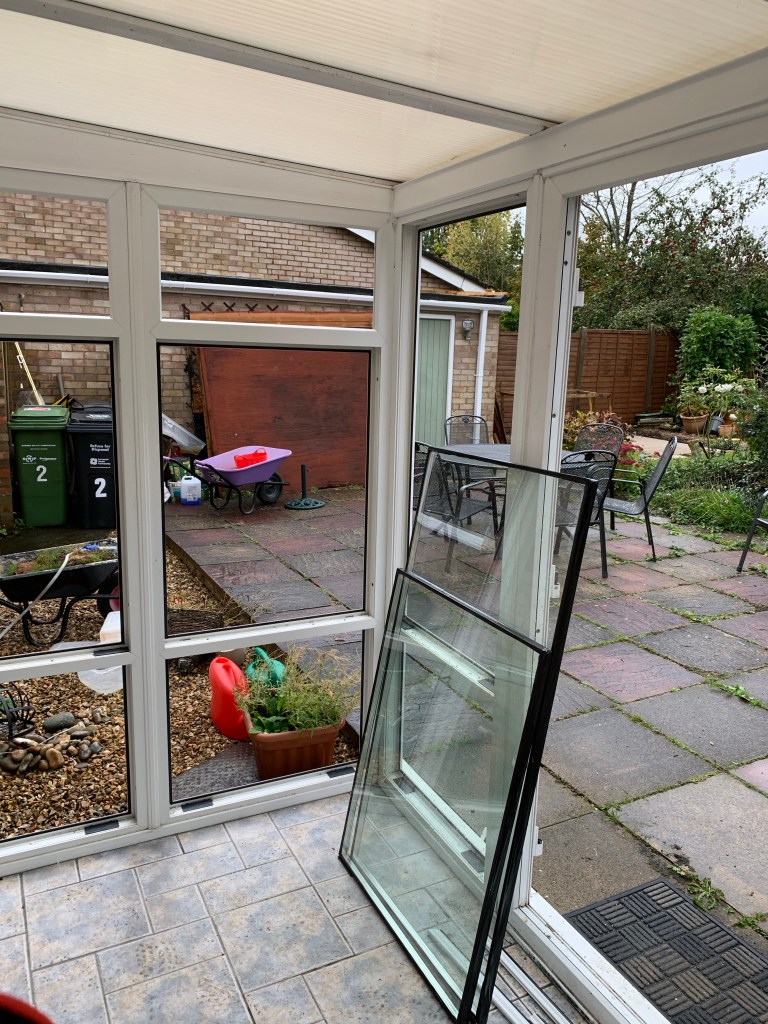
Working on the inside, take the paint scraper and nylon hammer and gently tap the scraper with the hammer along the seam in the frame. Start on the longest side in the middle for better access. Don’t be tempted to use a screw driver here or you’ll dent the uPVC. As soon as you have movement angle the scraper so the direction of force is towards the centre of the window glass and the frame trim will pop out. Remove the other three pieces of trim and the glass will be easy to tip out of the frame. Expect a couple of bits of plastic spacers at the bottom.
Step 3: Take the doors off. Very simple and don’t over think this. I started unscrewing bits but you don’t need to! Just release any door stays, mine just pulled out, then lift the door off the half barrel hinges. These are the heaviest bit so be careful.
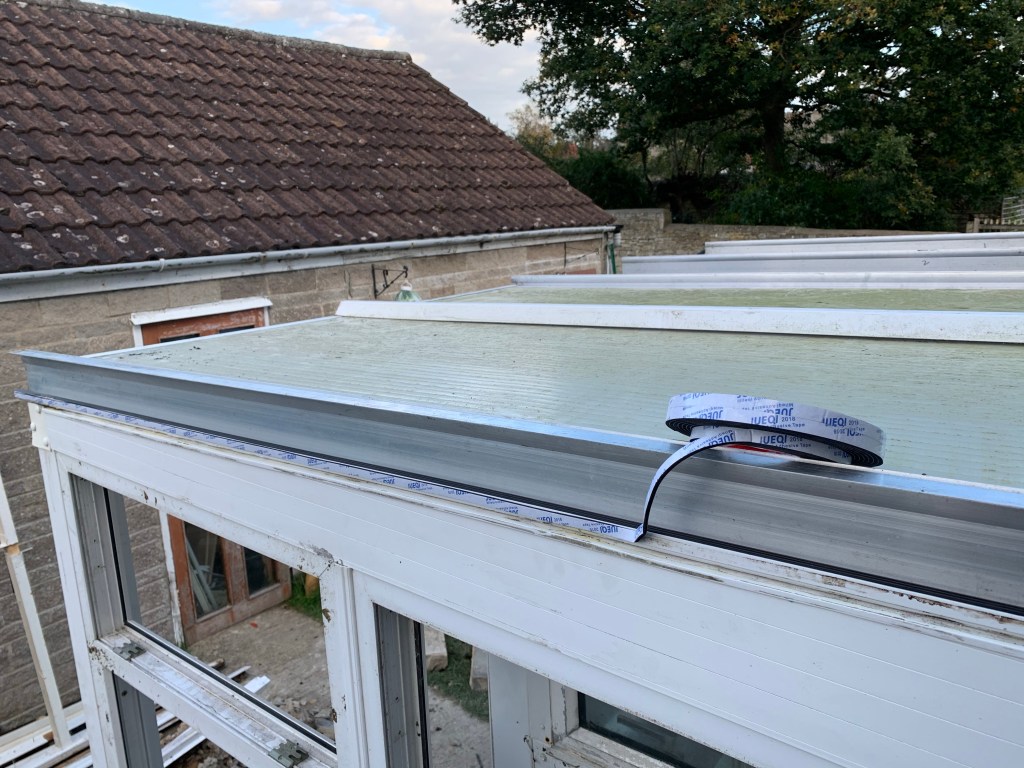
Step 4: The roof. It stopped raining and the sun came out so I had a chance to take the roof off. Start by removing the guttering. Then take any end caps off. The plastic trim on the top of the roof just lift off but be careful here because items can be brittle. A little bit of force is needed here to get the clip out of the rail. Next comes the roof panel. Mine was sealed at both ends, but with pushing from below broke the seal at the lower end and the craft knife cut the silicon at the other. These big panels come out very easily after that.
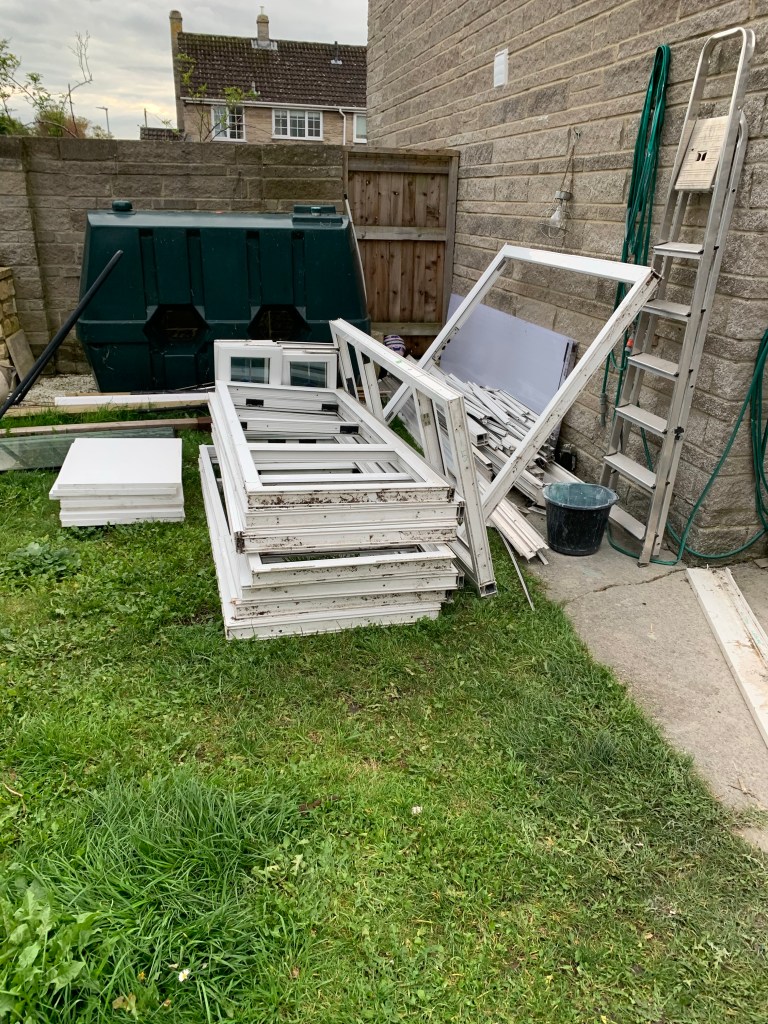
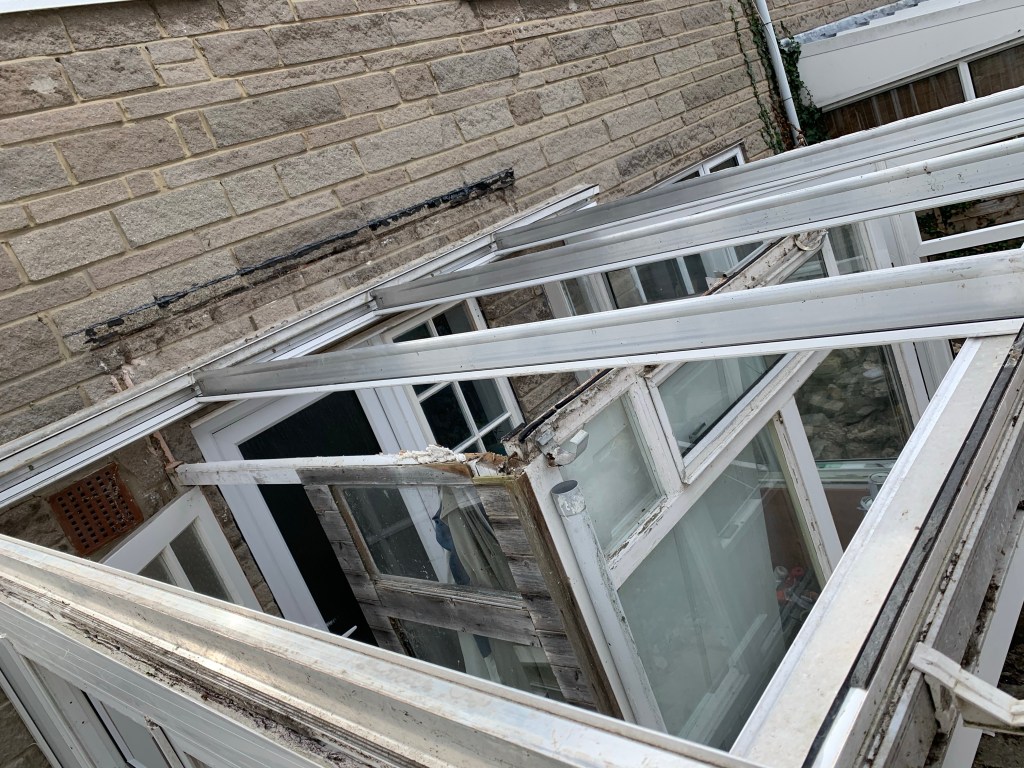
Step 5: the frame. The roof frames are just held on with a couple of 8mm nuts at either end so these came out quickly. A couple of extra screws held the end parts on but still easy to removed. Then the wall mount was removed at the house end, torx headed screws here. Then the mount on the lower end of the conservatory was removed. All simple.
The angle pieces on the gable ends then unscrewed. The rest of the frame just unscrews. I started with the door frame and worked my way around. There are metal supports between the window frames so only one set of screws need to be removed and a couple of screws through the floor but everything is very simple. I did have a couple of screws stuck into the floor but unscrewing everything else first then gently pulling the window frame I managed to snap these off. They are impossible to cut through/drill but are brittle so break easily when bent.
Step 6: getting it home. Two loads with the van and it was home. The tricky bit was fitting the french door frame in but getting that in first at an angle then packing around it solved the issue.

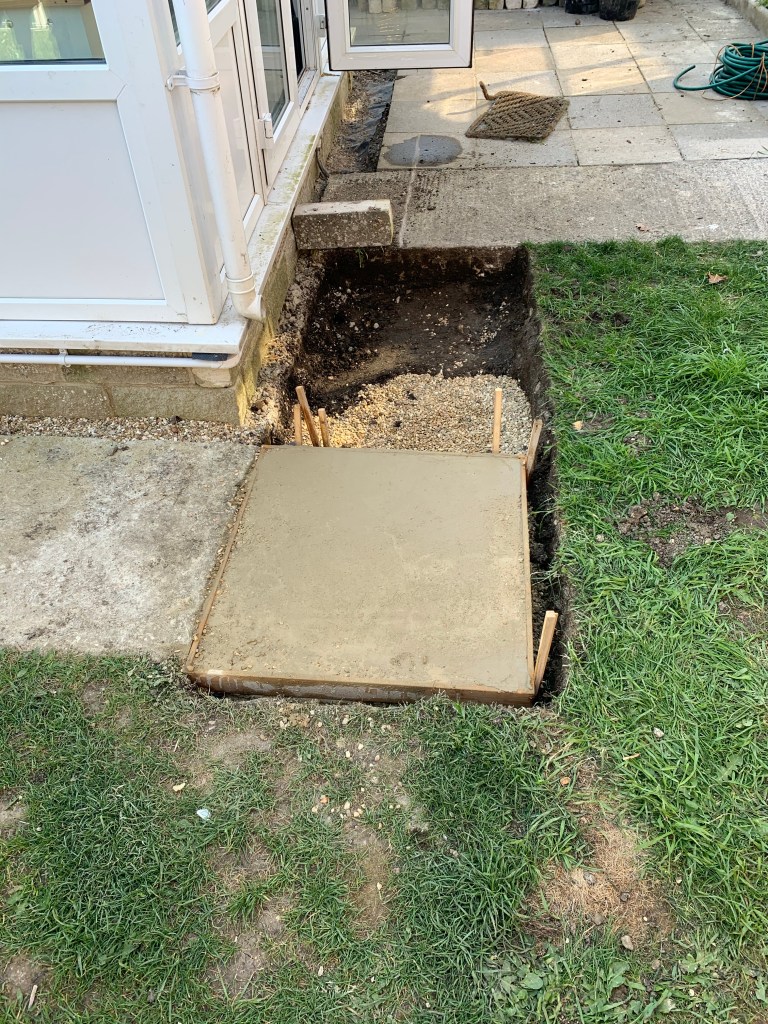
Time to rebuild. Since I only have a little porch to work with I needed new footings to build off from so a quick trip to the shop for a sledge hammer and pick axe.
Using the base of the conservatory to mark out I started lifting the paving slabs, some with concreted down but a bit of leverage from the pick axe soon had these up. The old paths took a bit move persuading. Using the sds hammer drill I chained drilled along the marked edge then hit with the sledge.

Heavy going but got there in the end.
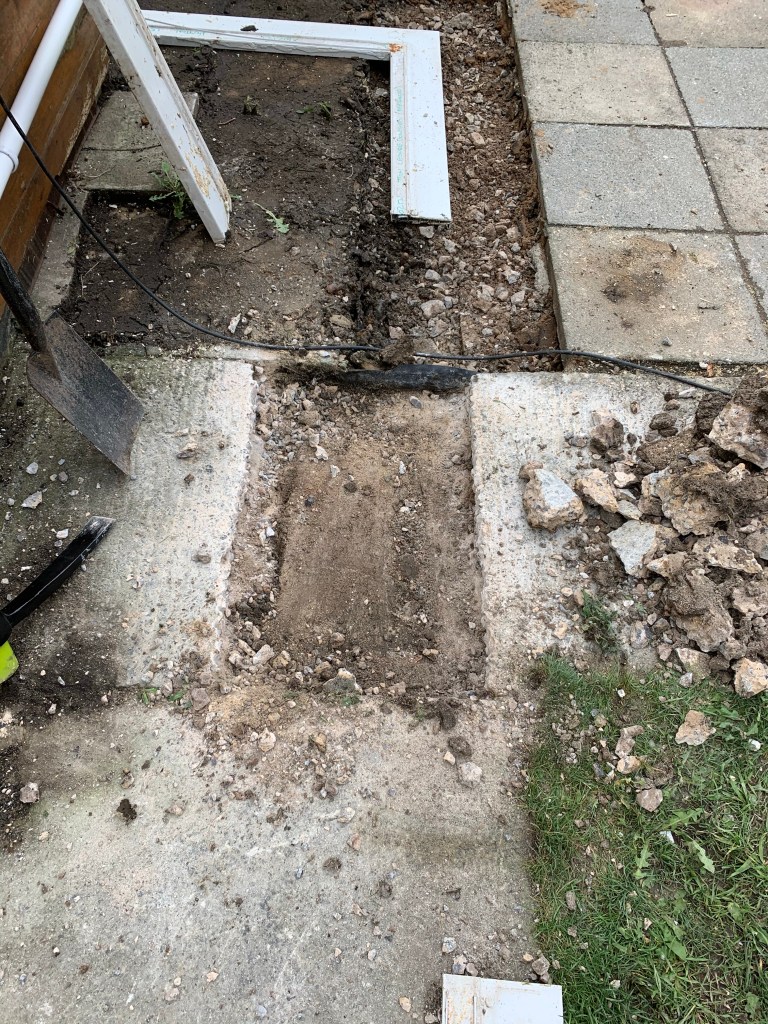
Then next bit of path was a lot thicker!!!! This needed a bit more thought. So using an angle grinder I cut slots into the concrete then drill through at the intersection.

Chipping away with the chisel on the sds drill started it off and under cutting the slab using a trowel and crowbar made it a bit easier going.

Finished the trench after about 3 days of digging. Lots of spoil to get rid off but will do that over a period of time to keep the costs down.

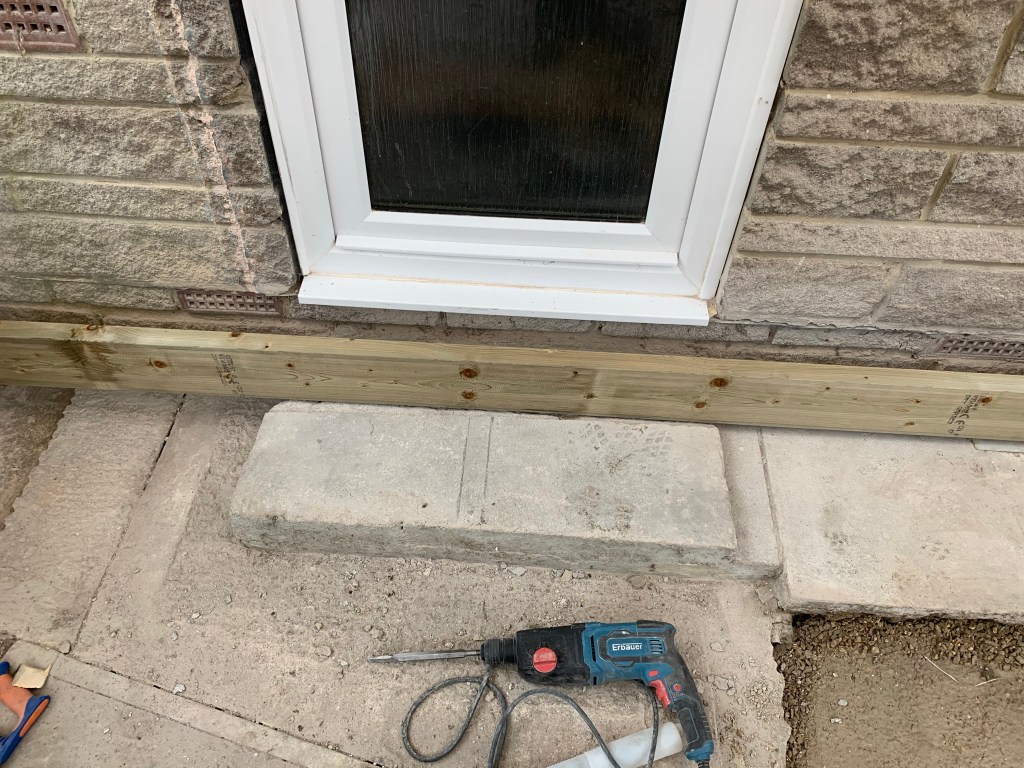
Next will be levelling off and prepping for concrete.
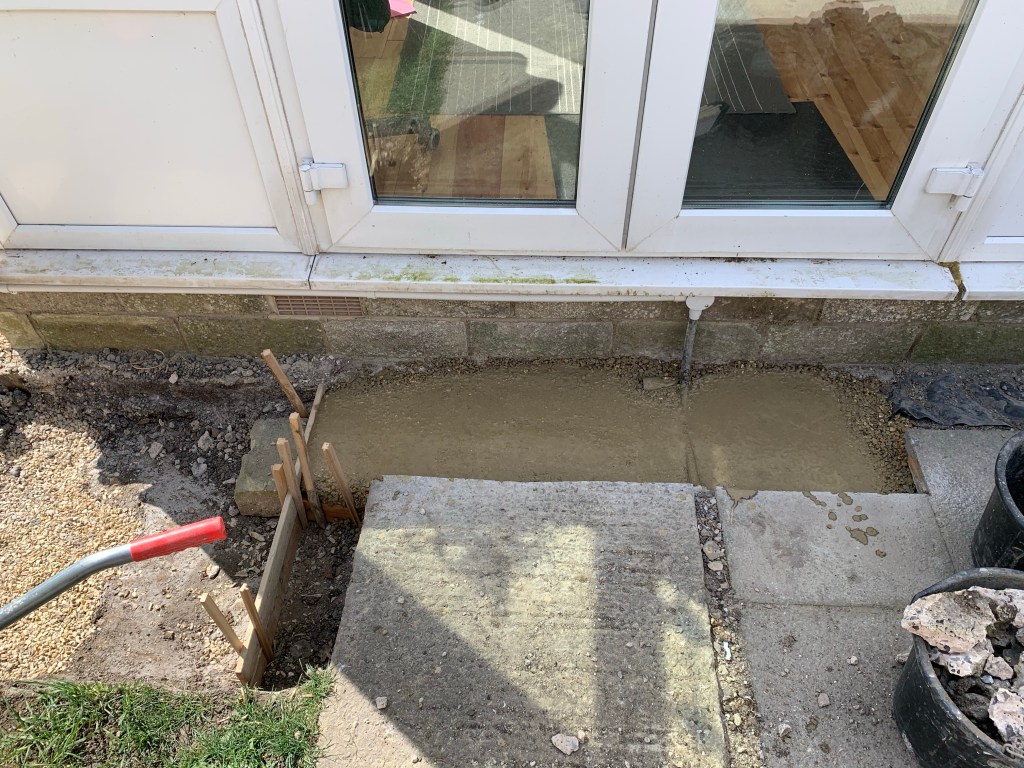
Using wooden stakes hammered into the ground gave me a level to work to. I needed 310mm, for the brickwork, under the damp proof course (DPC) so using a spirit level the stakes were positioned.
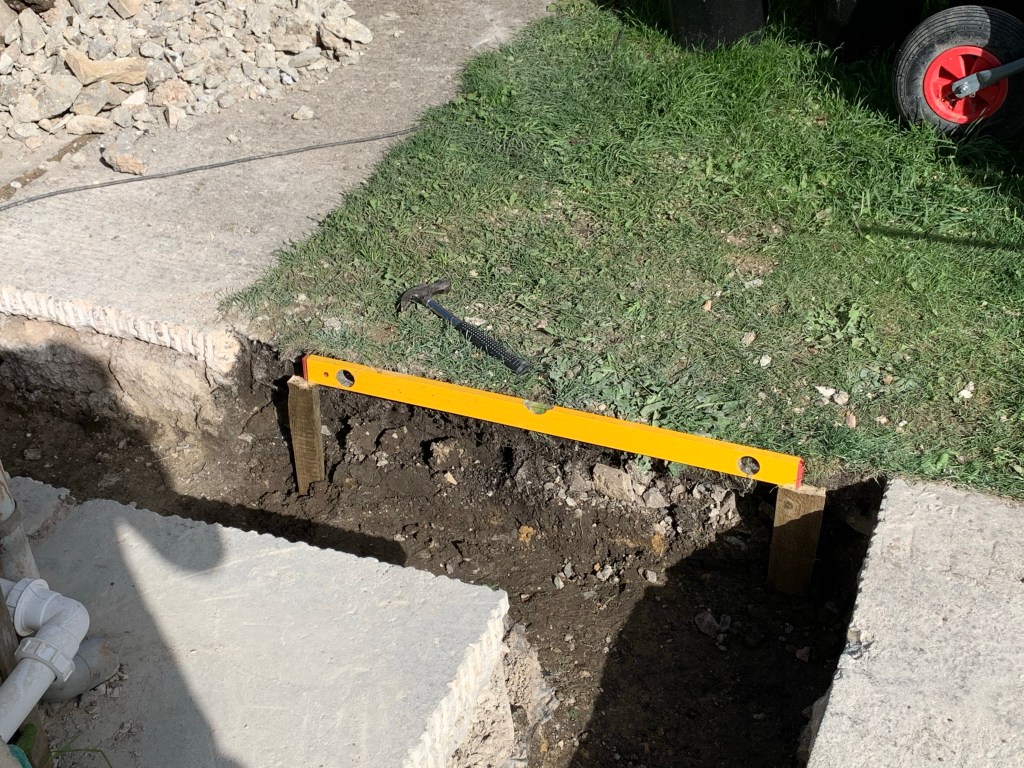
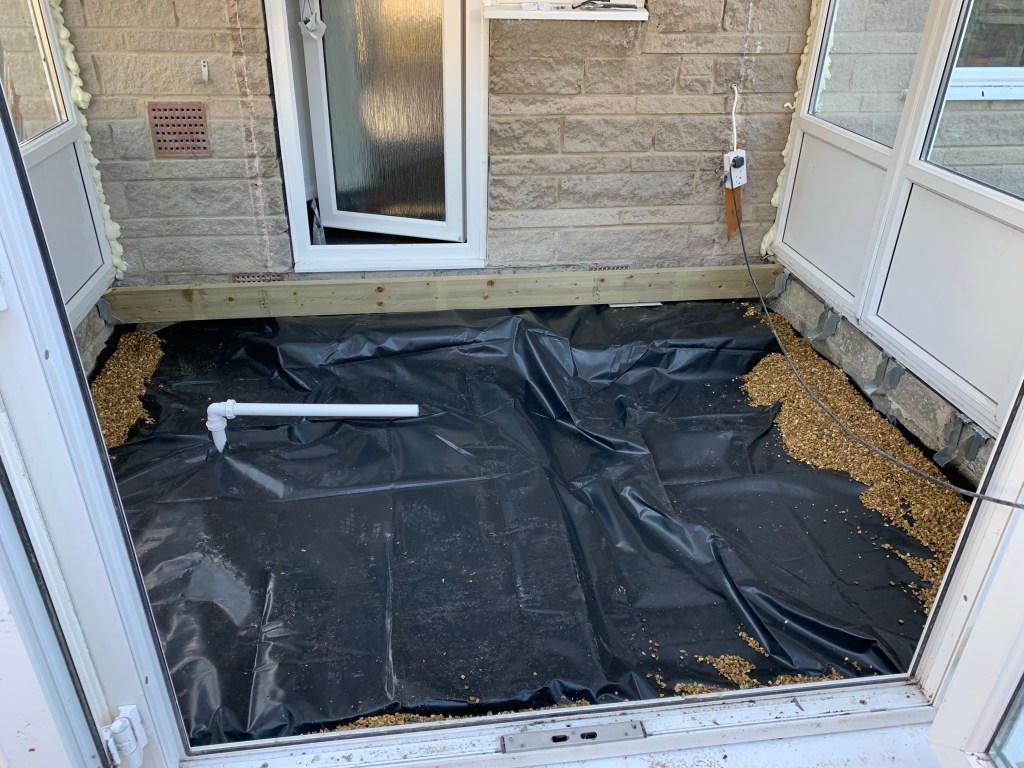
A quick to to the builders merchant got the concrete and between rain showers the foundation’s were poured.
Protecting the wet concrete with the roofing panels from the conservatory gave the concrete a chance to cure but a cat still managed to get under the cover and leave its mark!

I have a lot of secondhand bricks left by the previous owner from the front garden wall so using the SDS drill with a chisel I manage to give these a clean so I can reuse them. long boring process but cheap and gives me pre weathered bricks.
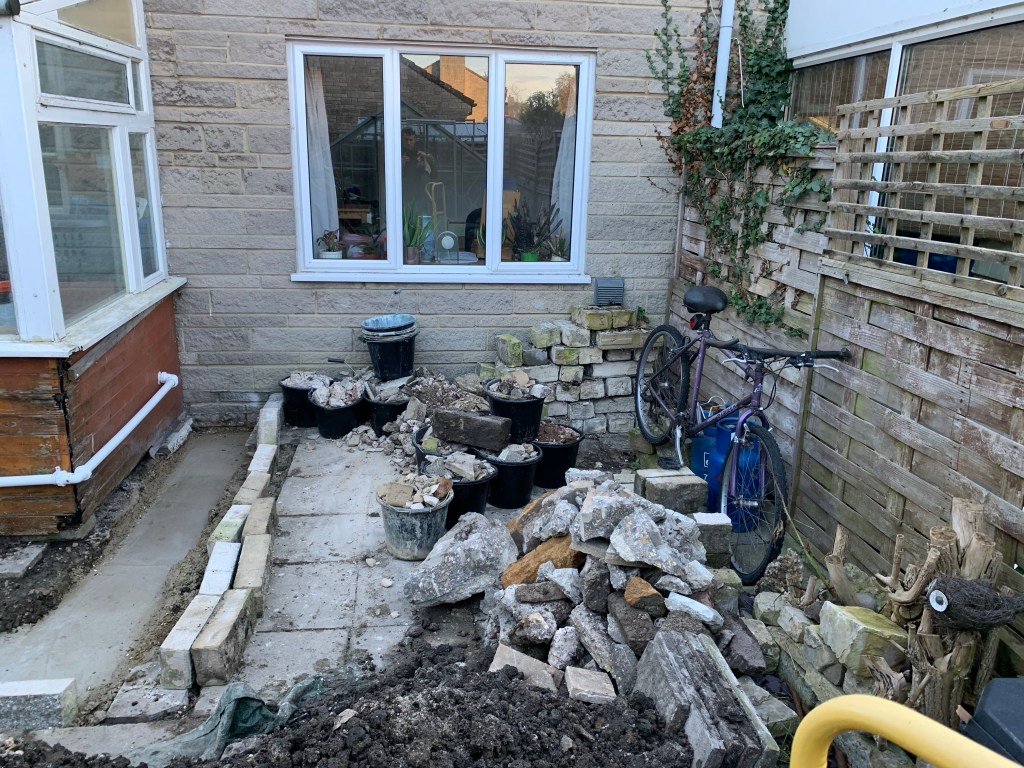
Now with enough bricks cleaned and ready I can start marking up so using the conservatory sil as a template, I hammered in some stakes and tied string on the line I wanted to place the bricks. I did put the string too low and on the inside of the brick line but I managed to work around this.

I started on building the corners first so I had something to work to and a couple of bricks against the building’s wall. Leaving these to dry gave me time to work out how many bricks are needed to fill the gaps between what I already built.
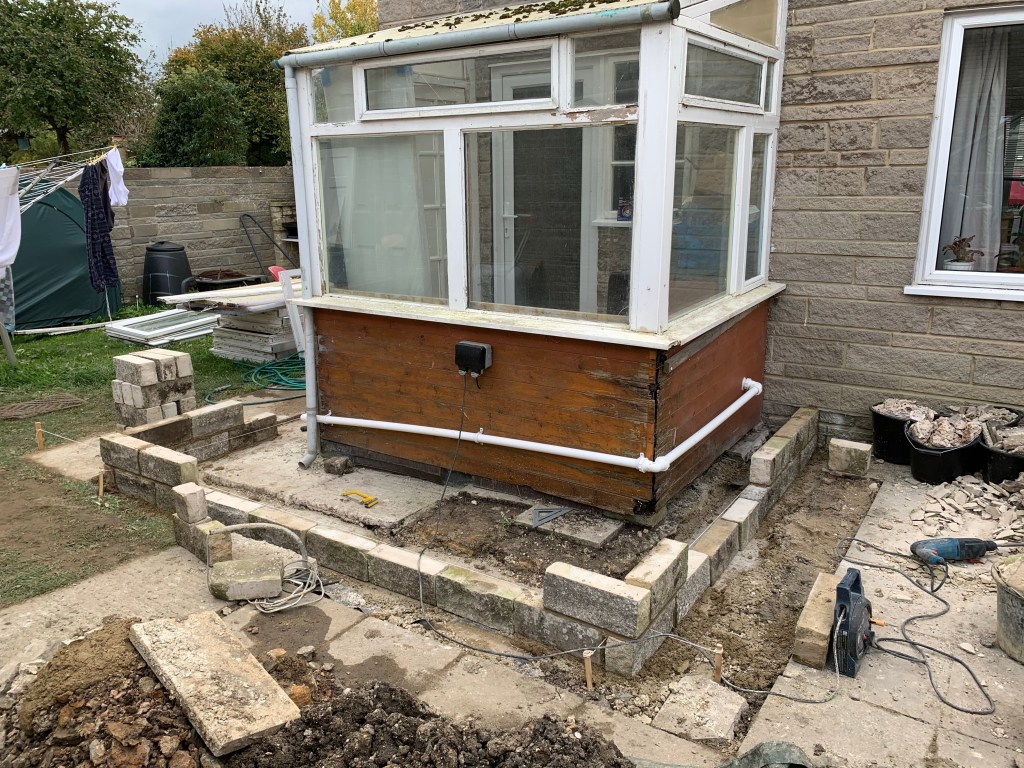
It turned out that the bricks I had fitted exactly the gap I had left over which is a first!
Next day and the complete wall was finished and I fitted an air brick/ vent opposite the one in the house wall. This required cutting a brick in half to fill the gap but no problems to sort with the angle grinder.

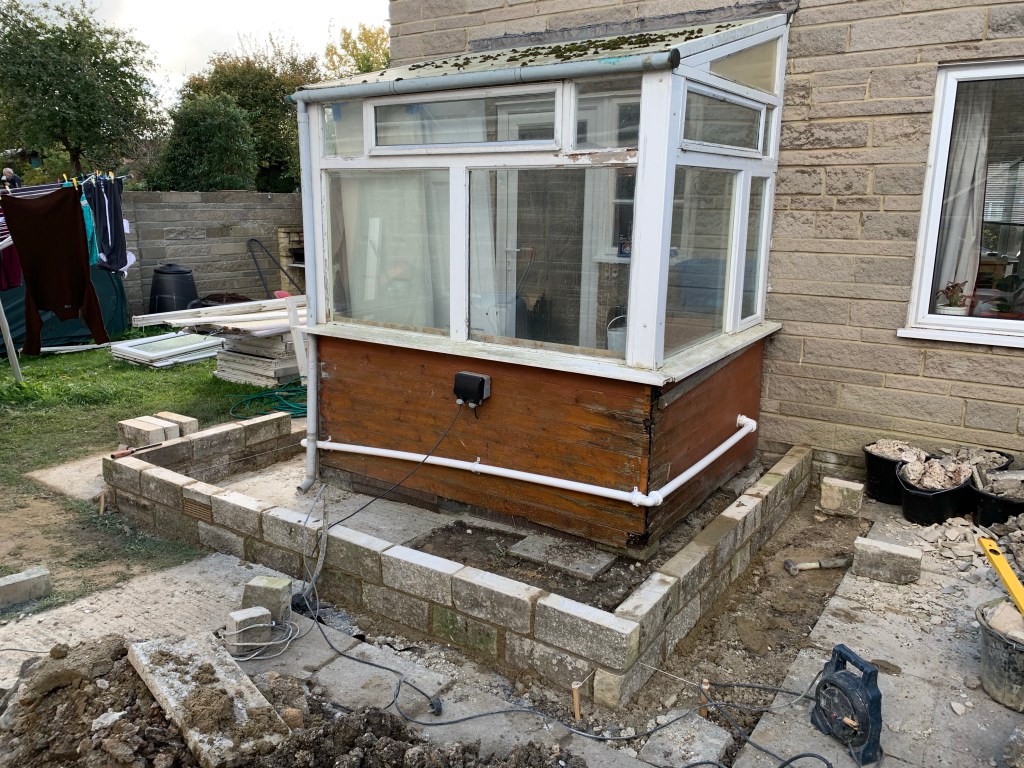
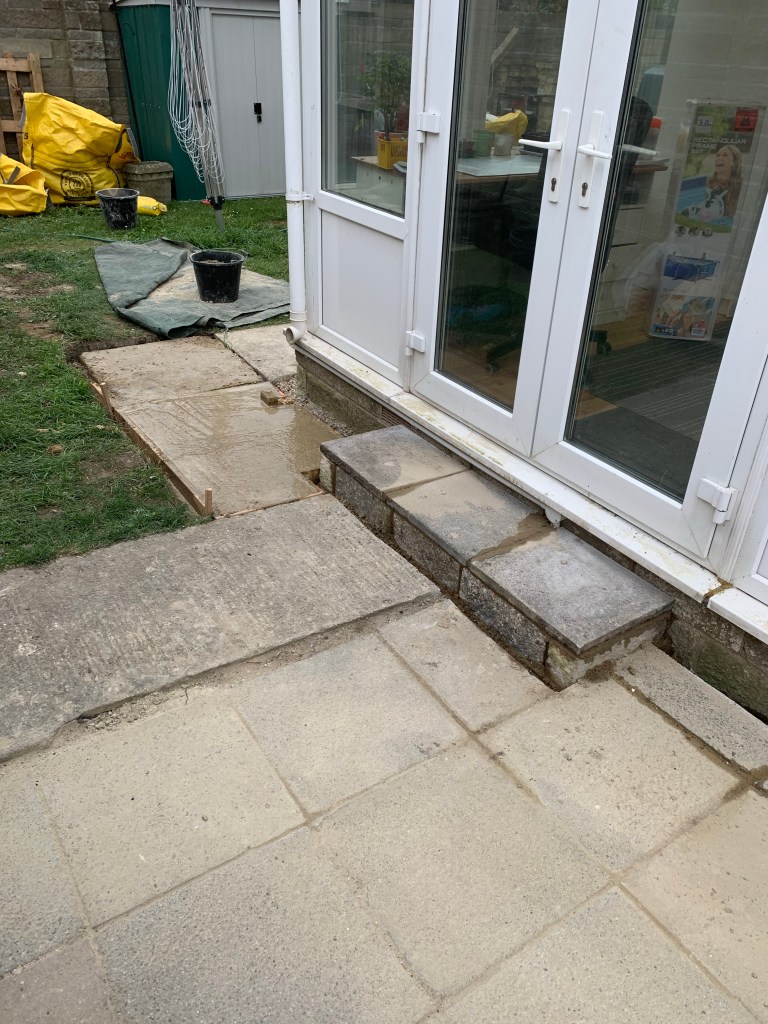
Topping the bricks with DPC then the sil.
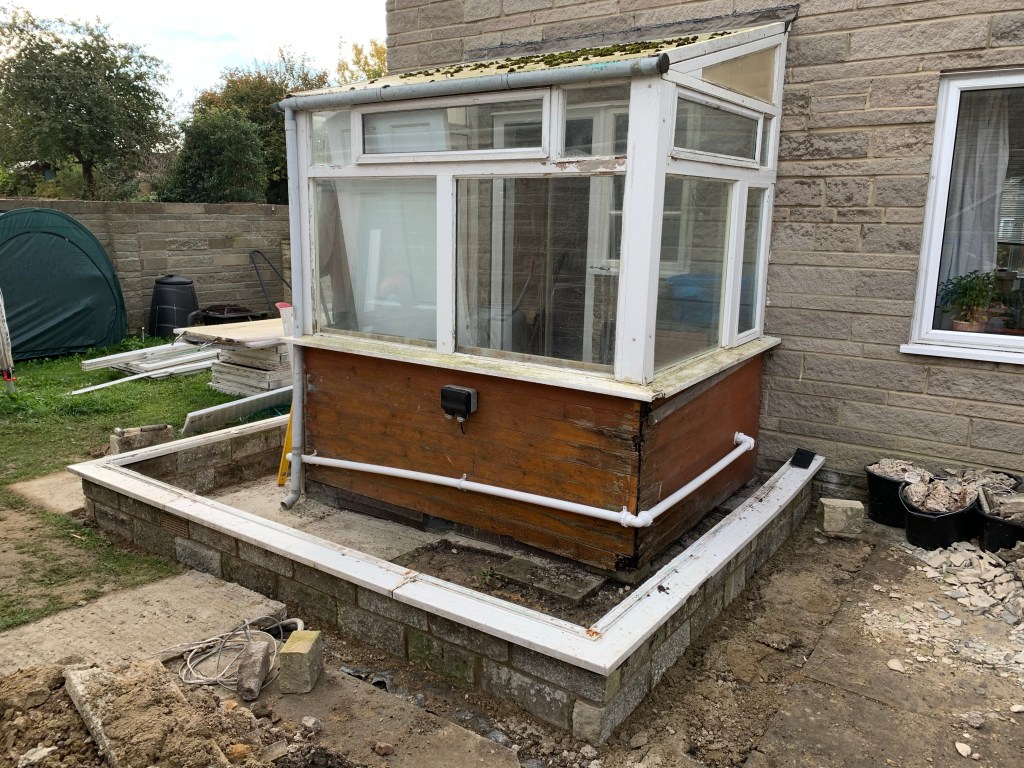
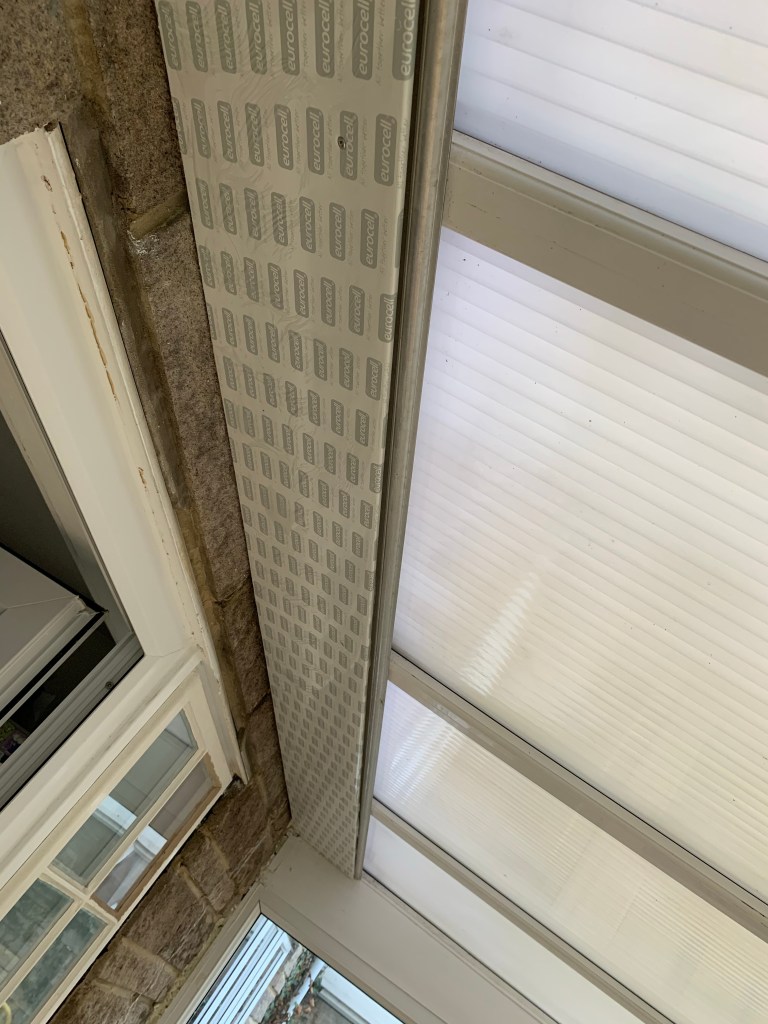
Frames go in pretty quickly using a level for the ones drilled into the wall. Get everything to line up took a bit of pushing and pulling but I’m happy with the results.
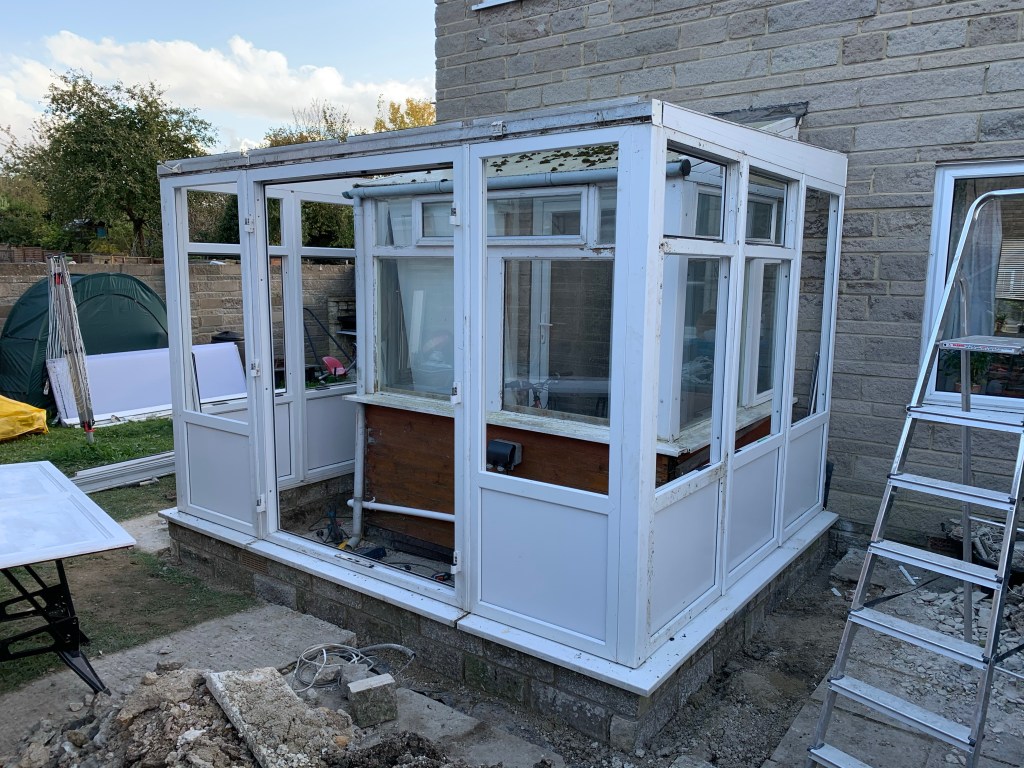
Adding the top frames and lower panels finished off my day. The lower panels go on pretty simply with the nylon hammer. The final clip needs bending slightly to get the corners in first so beat to leave the longest part last.
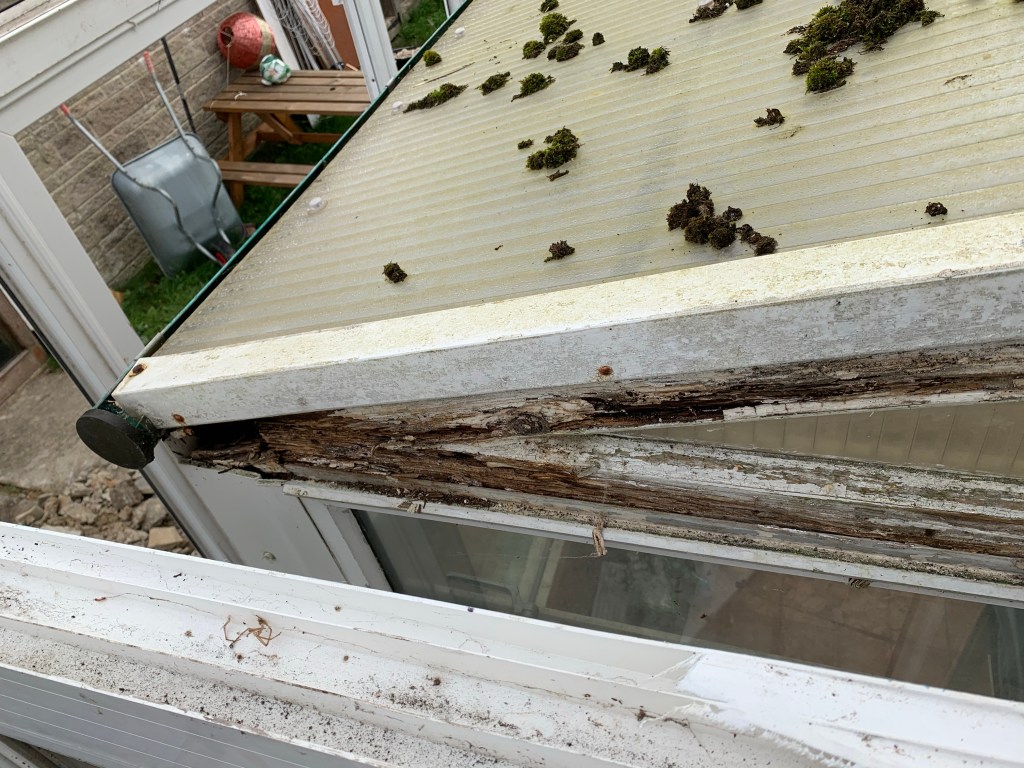
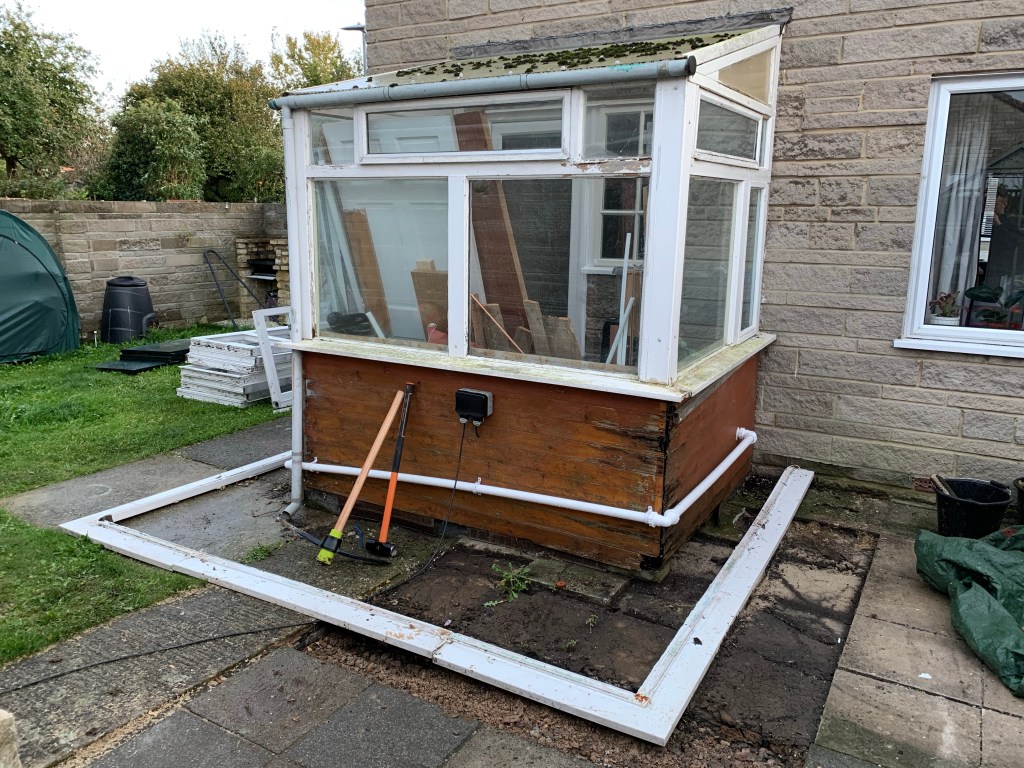
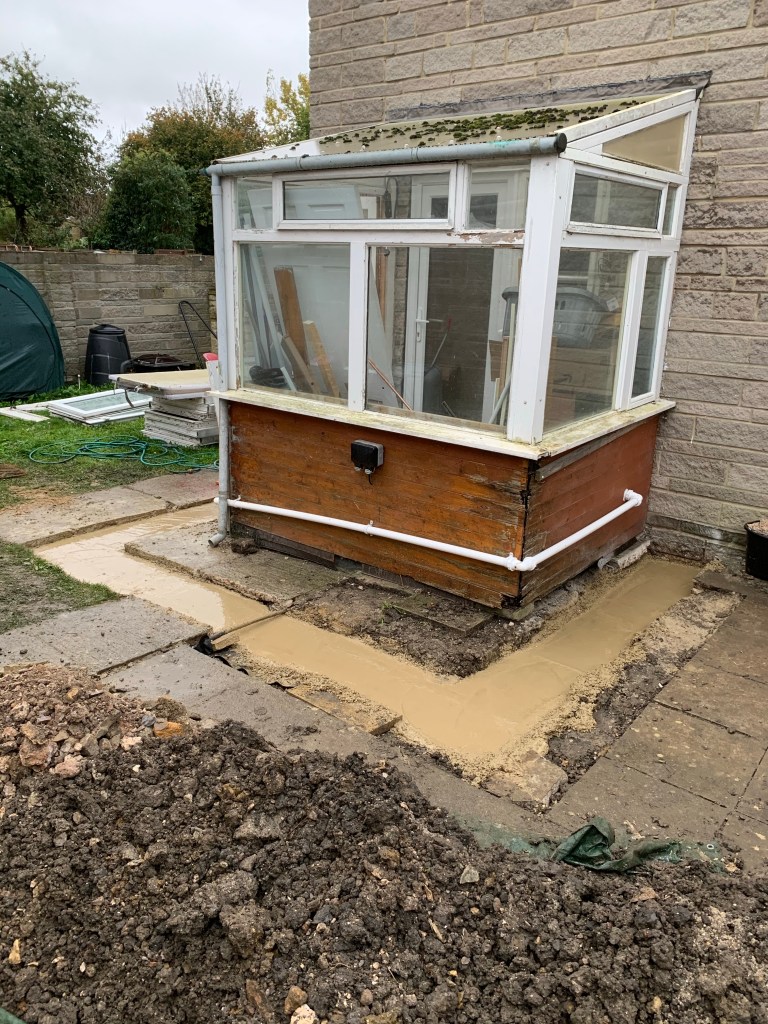
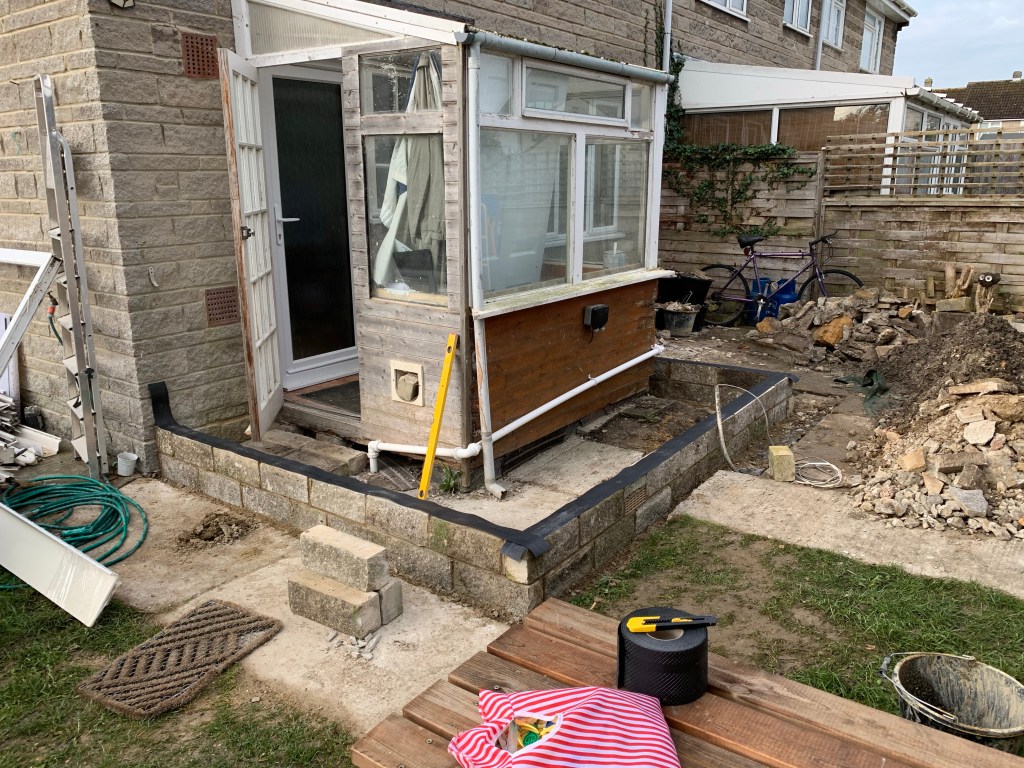
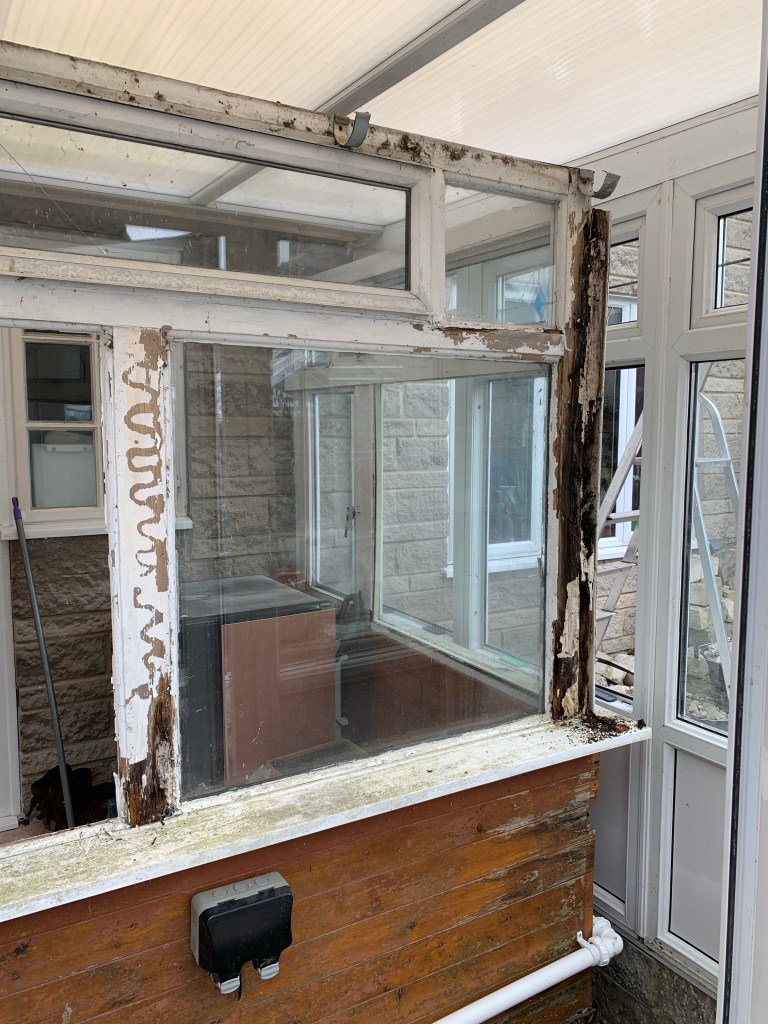
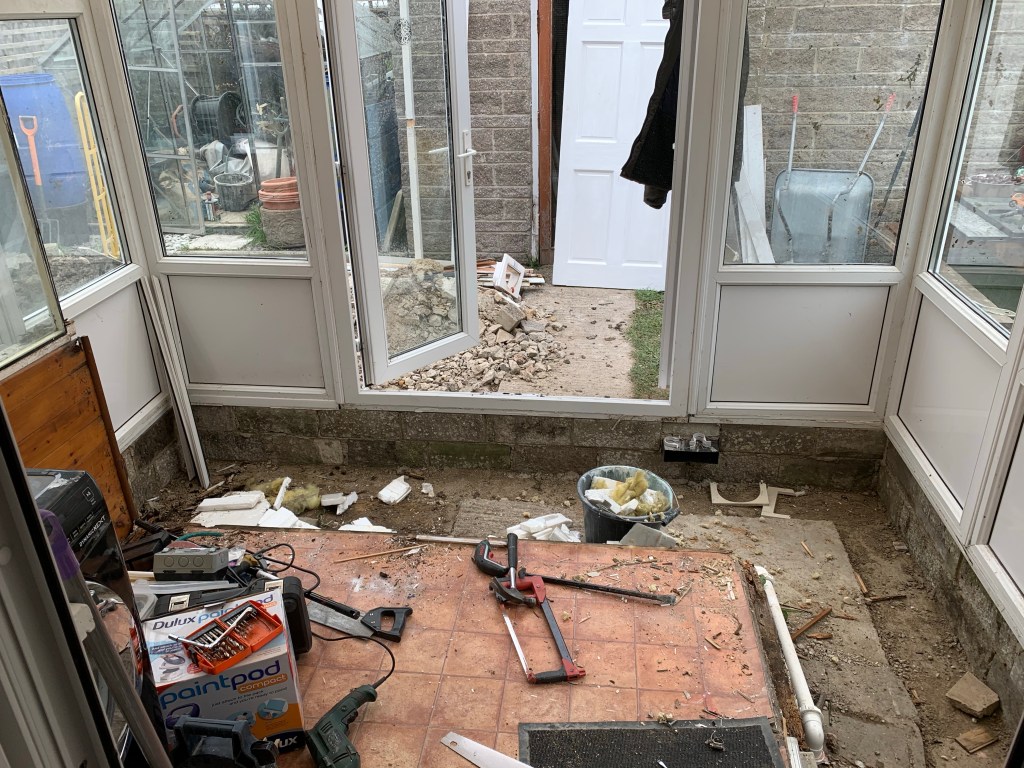
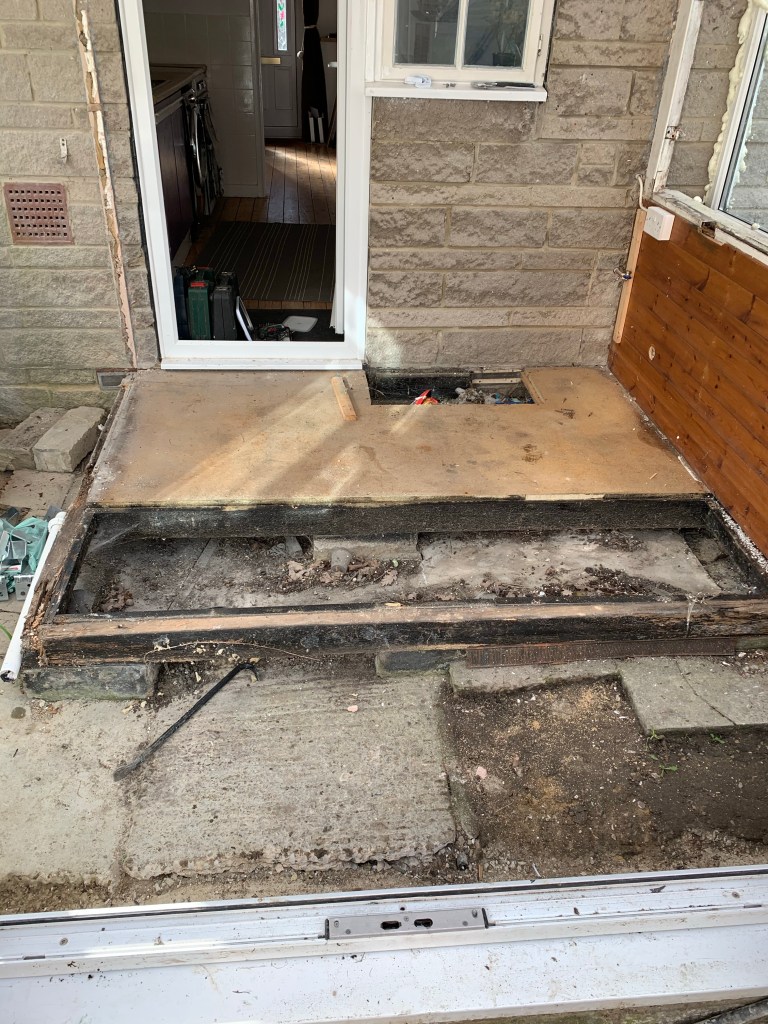
Pressure on now time to remove the roof off the porch. Removing the pvc cladding shows up the rot!
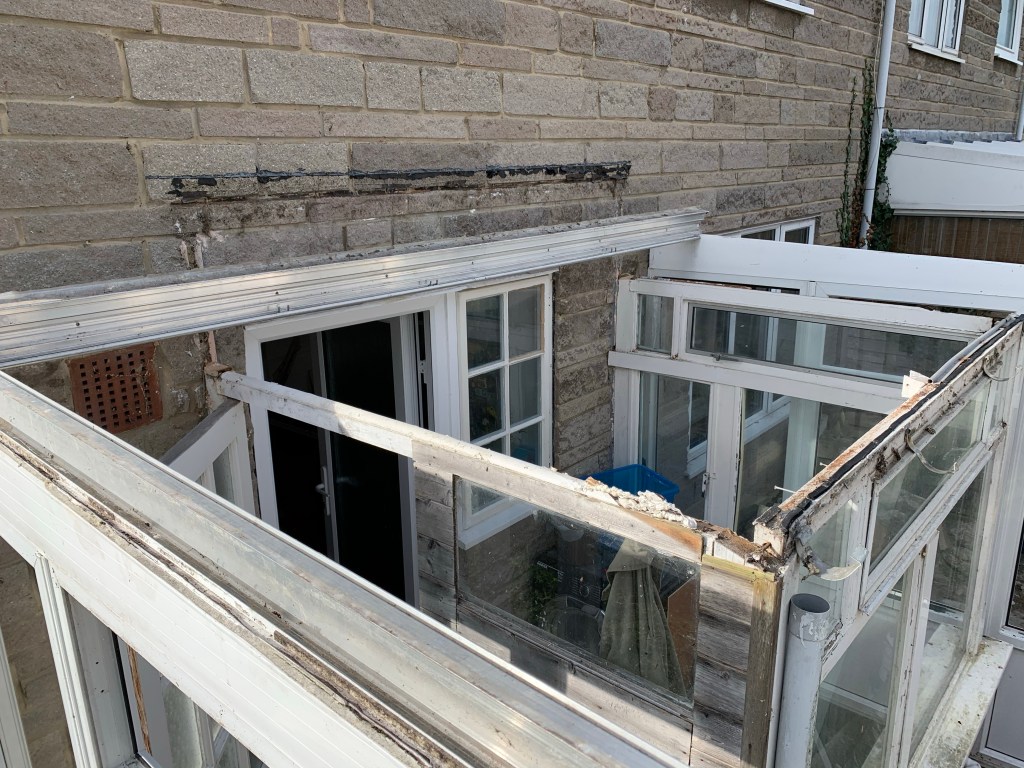
Using a saw and screw driver soon got the roof off. Putting the rear beam up gave me the measurements to fill the gap from the previous bungalow soffit.
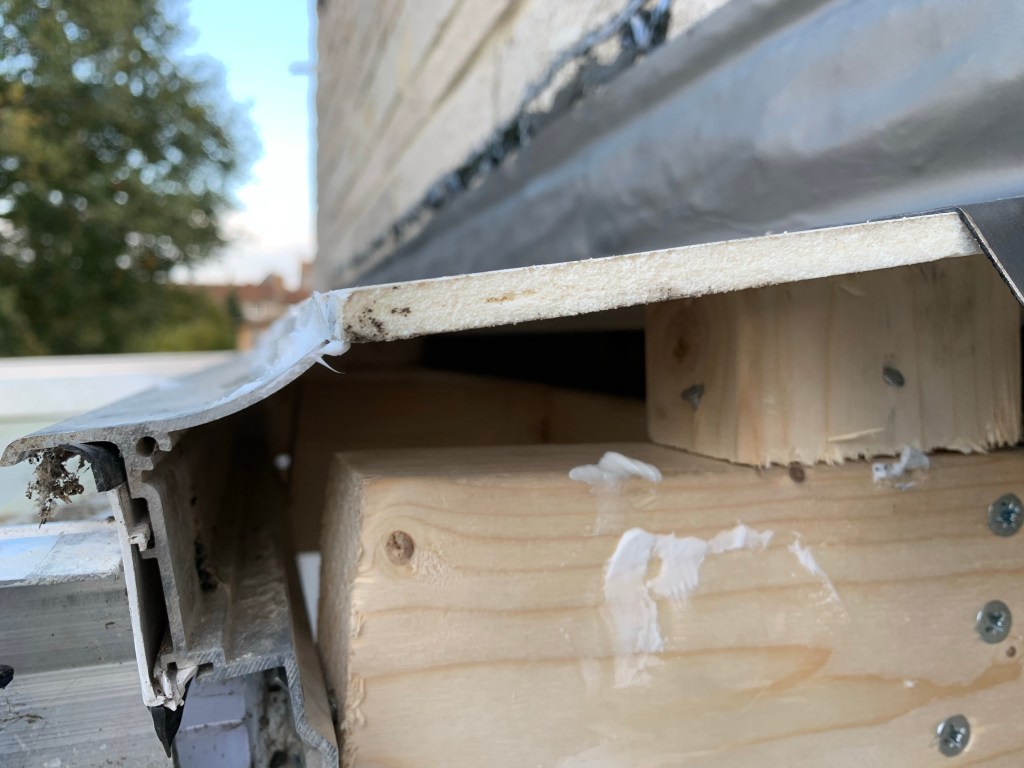
Keeping things simple, a bit of wood and some screws solved the problem. Then using some pvc cladding topped it off and gave me a seal with some self adhesive flashing.
Since the beams are a fixed length and don’t have a lot of tolerance I was a bit prepared to adjust to make fit but it fitted first time to my great surprise!
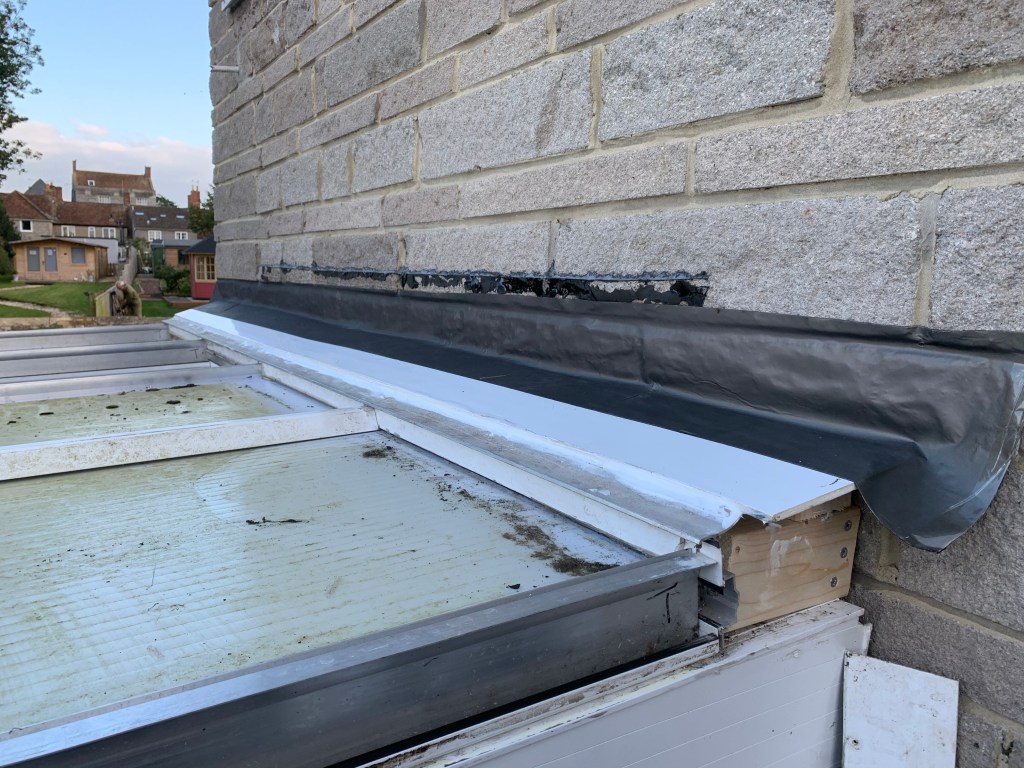
A lot of time was taken cleaning off old sealant ready to properly seal again.
Double sided foam tape was replaced.
Lots of up and down on the ladder but making progress.
Doors are heavy but easy to refit. Windows going in quickly but couldn’t fit the last two due to the porch being in the way. Run out of time again but a good day.
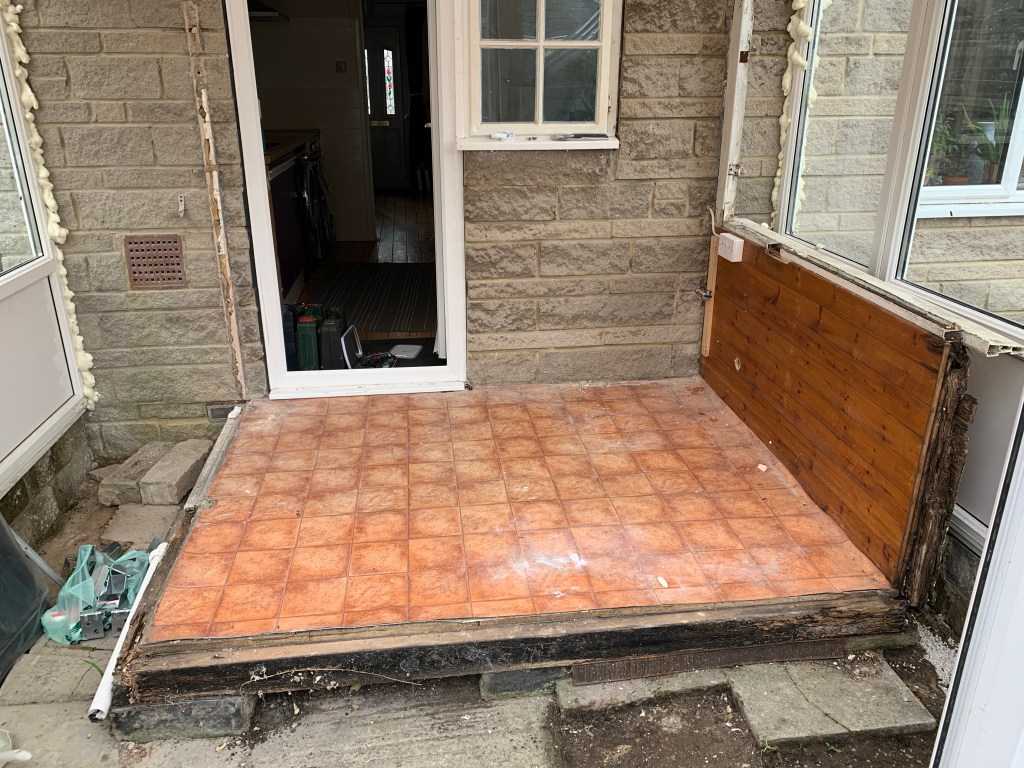
Time to remove the porch. Very easy due to the extensive rot.
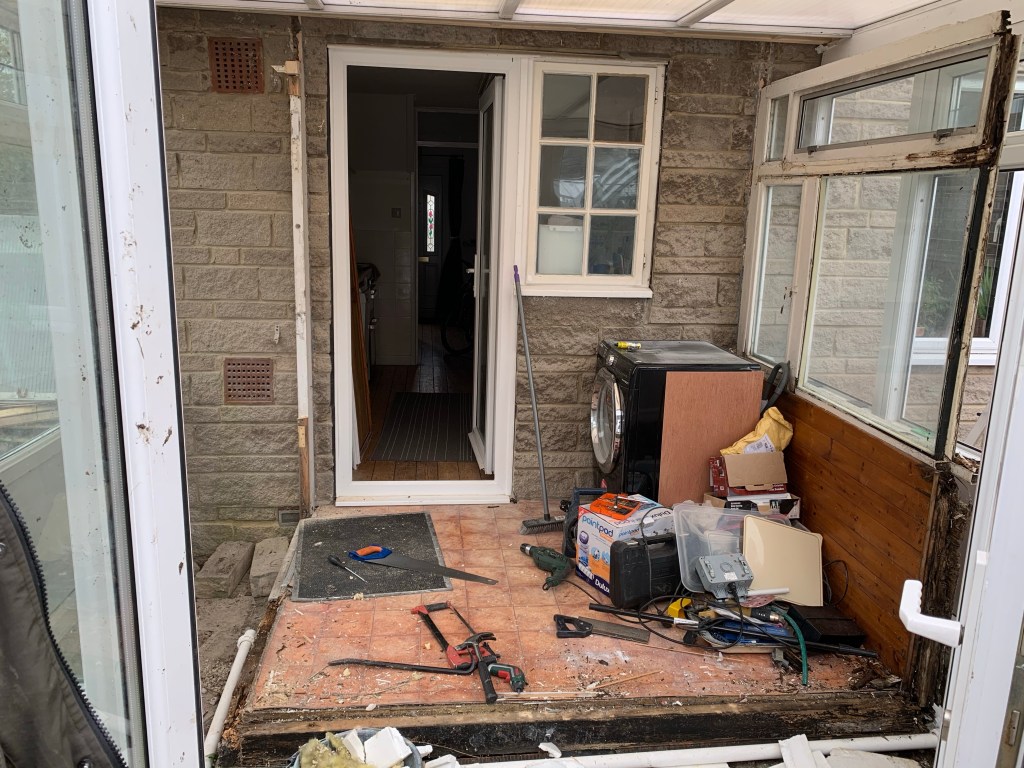
Final jobs completed with fitting the windows and some trim but run out of sealant and need some expanding foam to fill a few gaps.
Next to do is the floor but have to do that around work.
Well it’s time for an update, floor got cleared and out it went
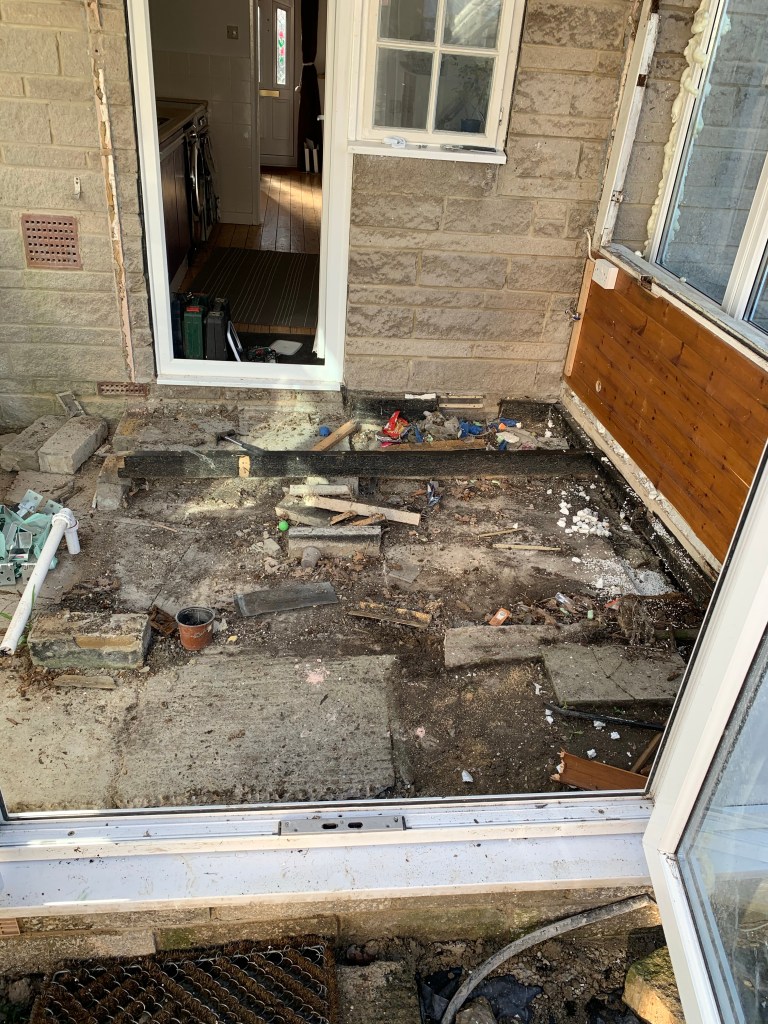
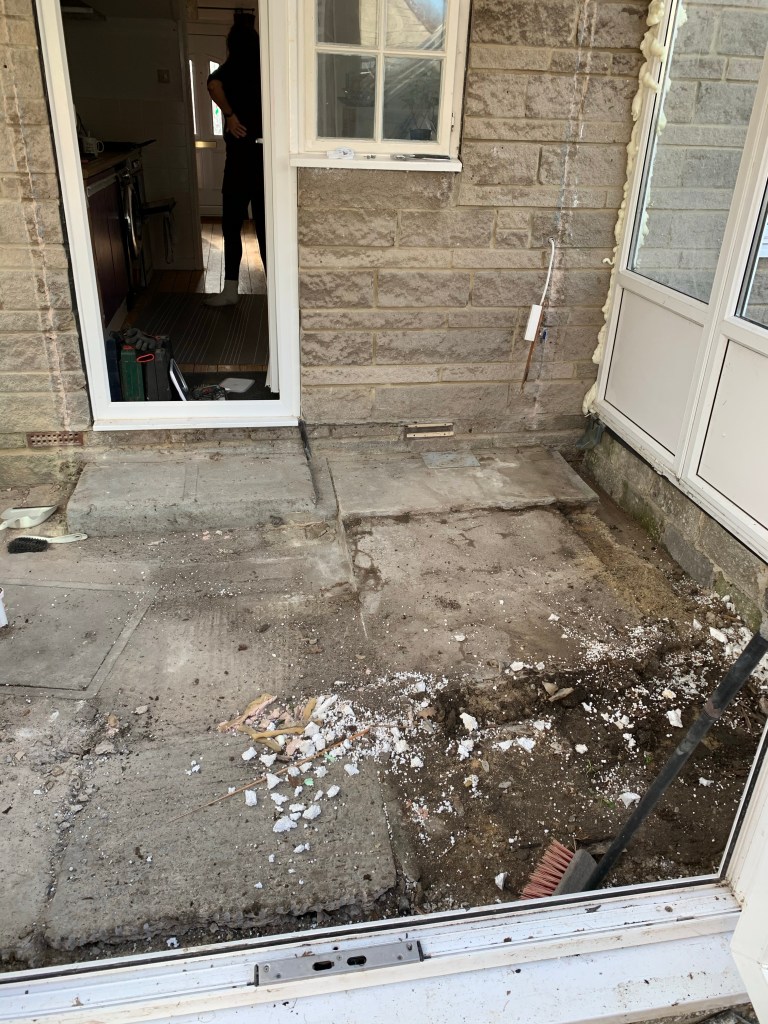
Since the right hand side was completely rotten and it’s bare soil and thin concrete underneath, I’m thinking this is the possible cause and I need to do something about it before suspending a new floor over the area so out comes the spade and a bucket.
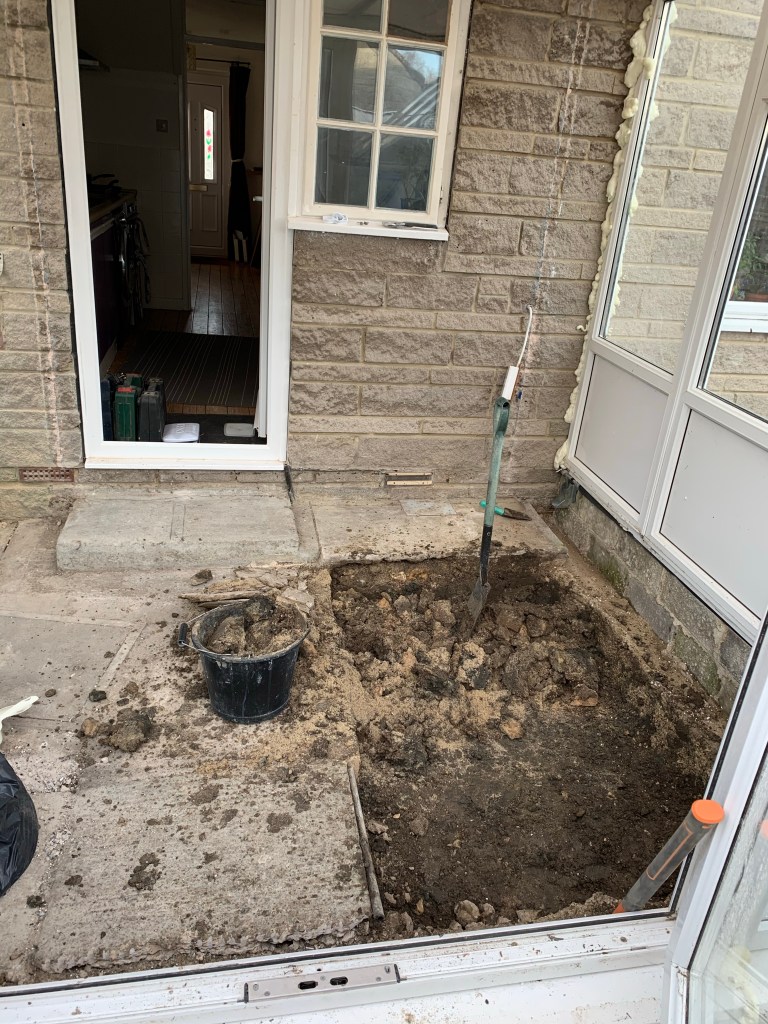
More clay and old bricks but managed to get the mud out. I also managed to clear some of my rubble pile by throwing it in as a good base and compacting with the sledgehammer. Then one bucket at a time I filled the rest with concrete. Working until it was dark!
Now I’m going the easy route with this and using joist hangers on the single skin walls. Six either side. I did only buy six at first then realised that 6 joists have two ends so I had to pop out and get six more as well as so 4” nails. Luckily the power went off for the time I was out so no time was wasted.
The first joist went in but the old back door step ended up being too high so the joist just sat on top. Out with the angle grinder and SDS drill with chisel cut a channel to solve this.
Because I’m worried about all the different slabs of concrete I’ve decided to add a bit of damp proof membrane down to cover all the gaps.
And since I have a bit of gravel left over……… I used it to weigh the edges down.
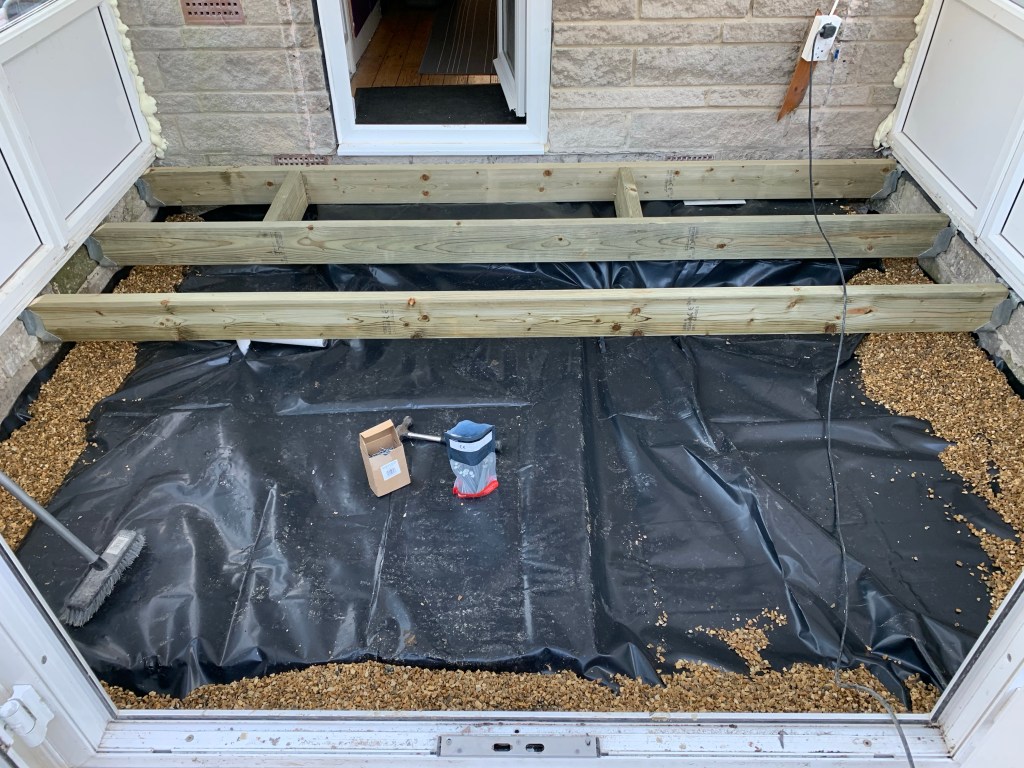
In go the joists. I had to cut a chamfer on one end because the conservatory walls had a bit of a lip on one side. Also I did remember not to trap my power lead under the joists.
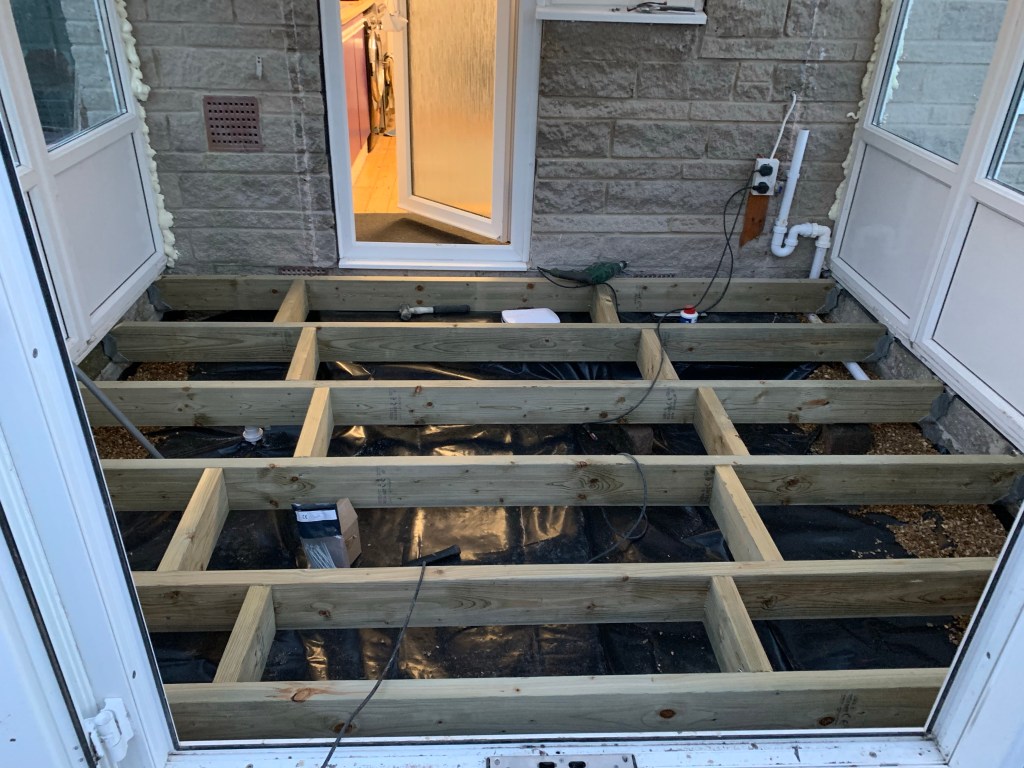
Adding the waste pipe for a washing machine and finishing off the joists. Used a bit of solvent weld on the waste pipe, don’t want any problems down the line with a waste water leak. Getting dark already! Where does the time go when you’re busy.
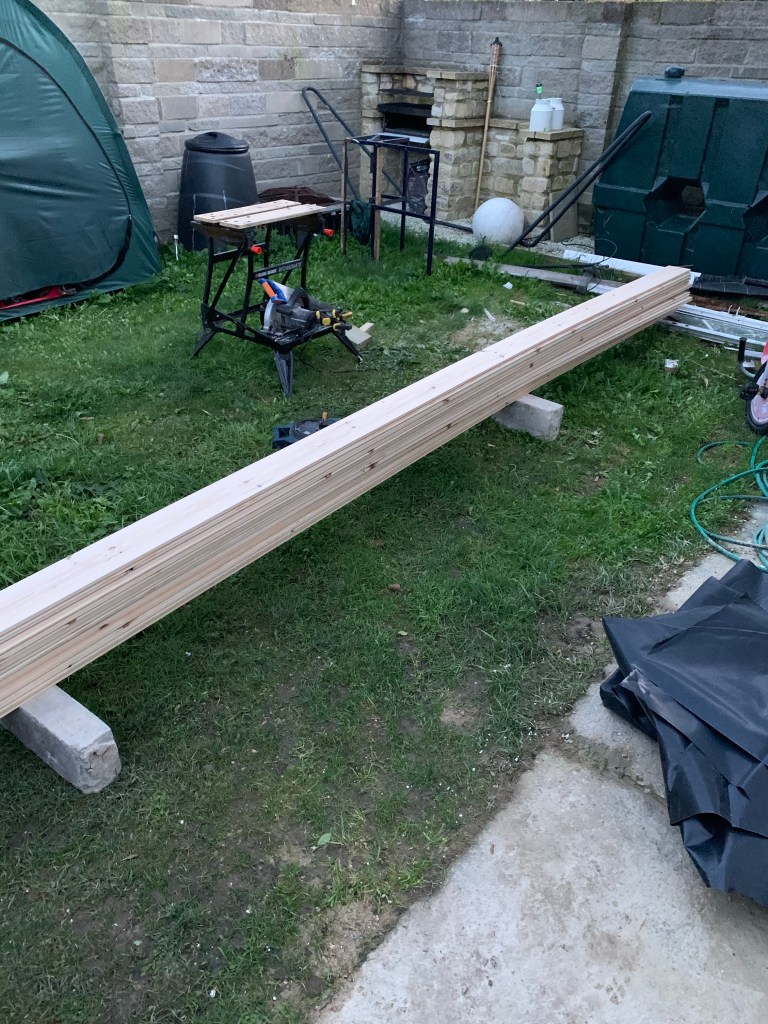
The weather is touch and go with rain so I don’t want to leave these out overnight! I don’t want water staining the floor. These won’t fit in one piece so I measured one end and cut to size then put the spare piece straight inside.

Leaving access gaps for maintenance the first part of the floor went in. Getting everything lined up took a bit of shoving and pushing but I did have a bit of off cut to hammer the tongue and groove home.
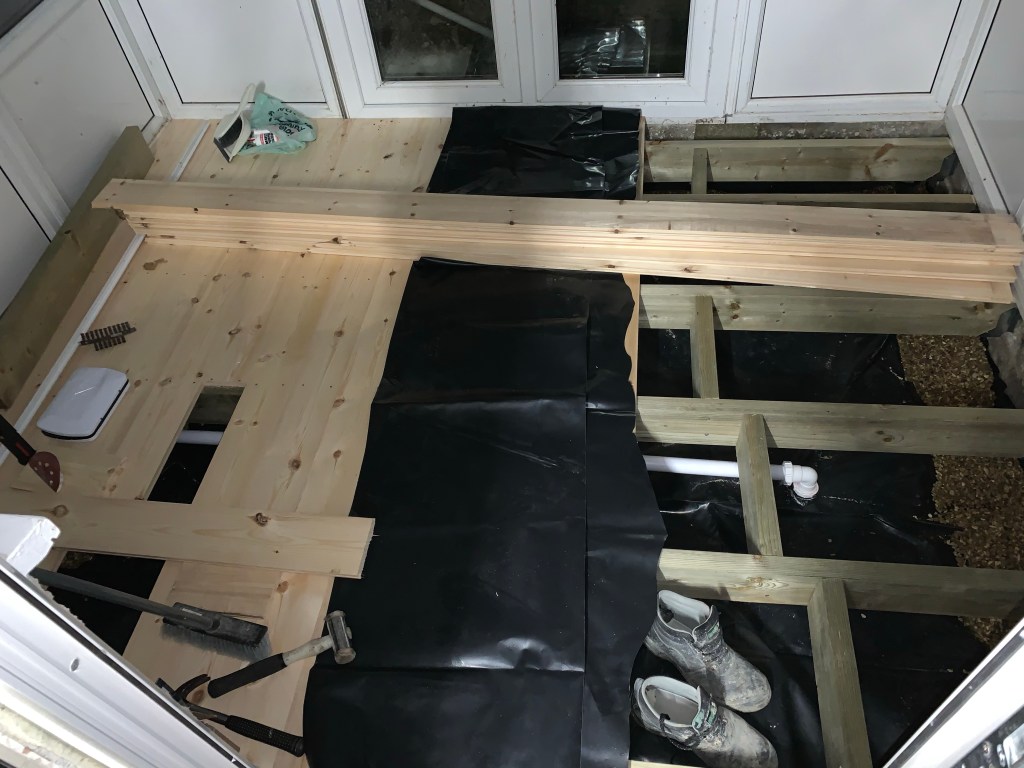
Run out of time and light but everything is now under cover. The floor looks great but it is a bit tight on the back door sil and making a creaking noise when walked on so I need to trim it slightly and add a piece of trim over the gap.
Update.
I finished the floor and gave it a good varnish with some polyurethane varnish, it’s more expensive and smelly but it’s hard wearing and better with dirt and water.

Finishing off with a bit of upvc trim
Outside finishes including adding footpaths, step and repairing the patio.


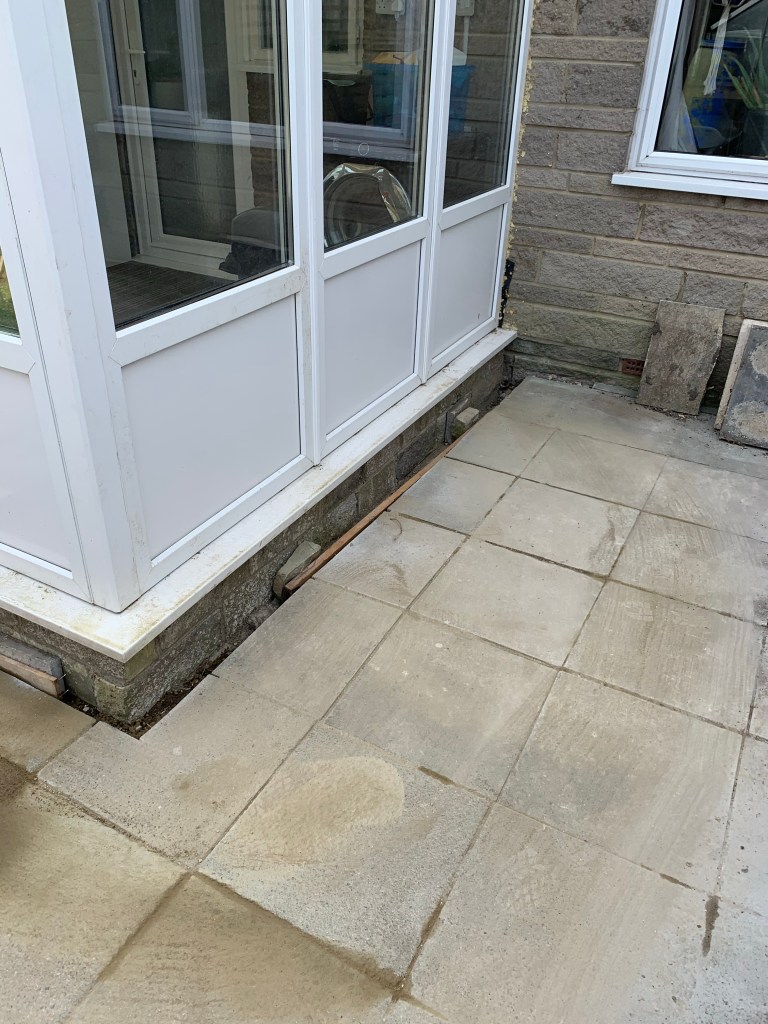
Using the rest of the gravel fills the gaps around the base. I also cut a bit of uPVC to cover the ends of the infill for the roof. Plug sockets and lighting was relatively easy to re-fit and made safer than what was inside the wooden porch.
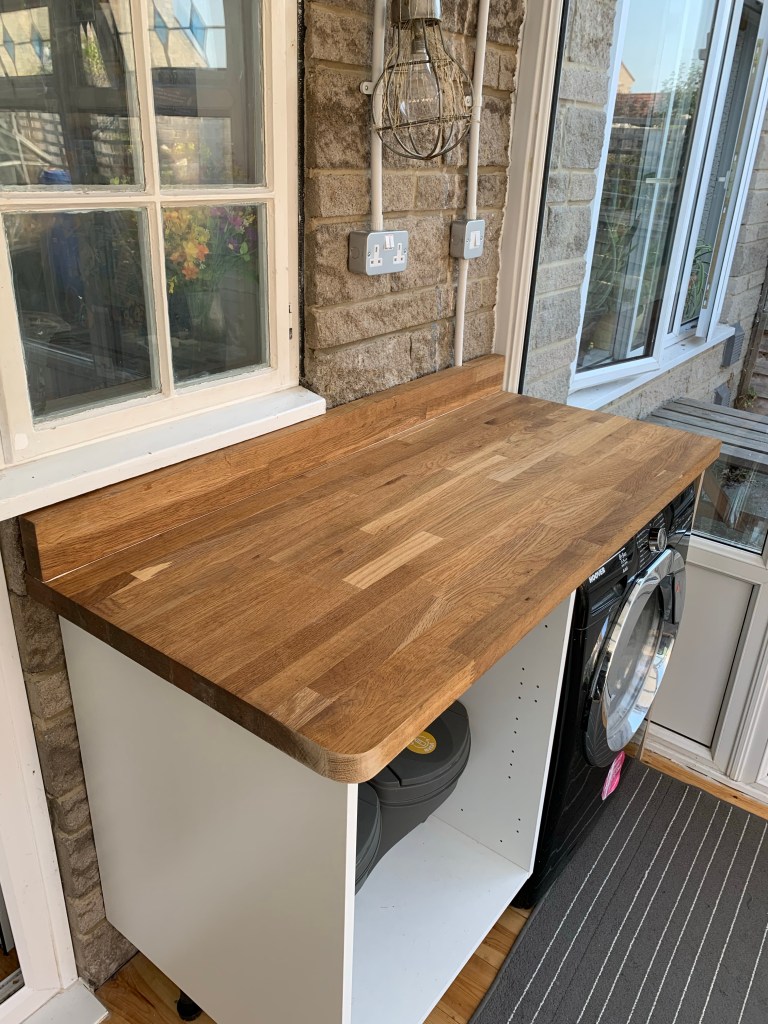
Just a quick update, with the theme of keeping costs down I decided to put a little worktop and unit in myself, worktop use to be a kitchen island bought off Facebook for £30 and the unit is a simple item from B&Q for £30.
Cutting the worktop to size was straight forward and I used the off cut as a small splash back to hide the joint to the wall.
Will eventually put on a door, to the unit, when I find something cheap that I like.

I wish you were my husband! Great job 🙂
LikeLike
Hi based of your experience is it possible to move the door to the different side of conservatory?
LikeLike
My conservatory is modular, each panel is the same size and shape the only difference is the bits attached. So I don’t see why the door couldn’t go in a different position, but with the conservatory being secondhand, holes have already been drilled and age can warp items over time could cause a poor fit/finish. Nothing that couldn’t be overcome with extra sealing and pushing/shoving/ head scratching depends on how much trial and error you want to mess with.
LikeLike