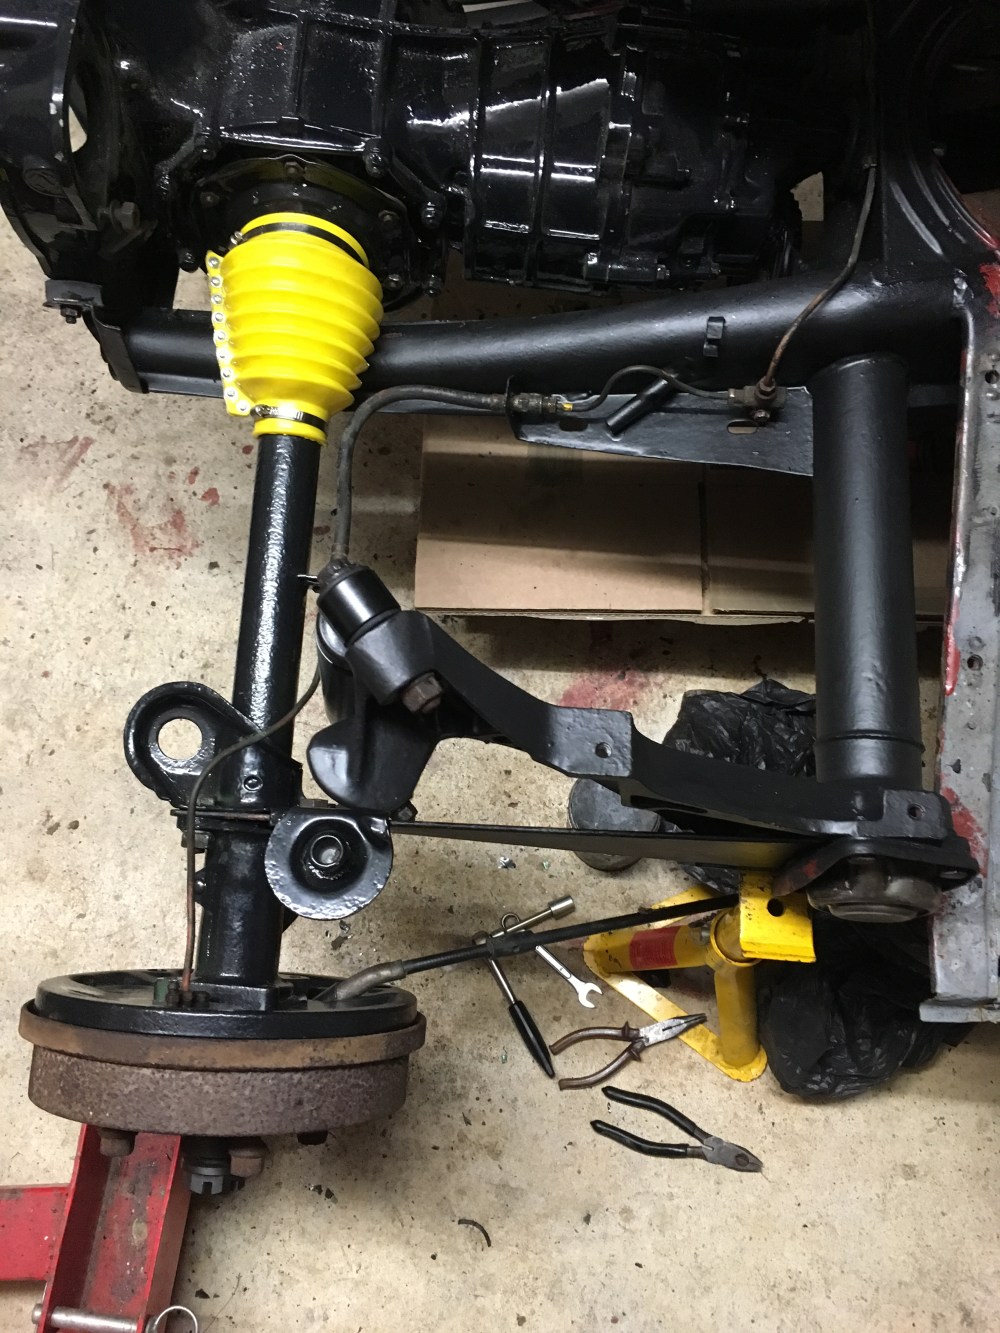
With the gearbox in position and all the bolts fully tightened it was time to fit the axels to the swing arms/spring plates. I’ve decided not to mess with the torsion bars yet due to the changes I’m making to the back end so the end caps have been cleaned up and not painted, also I’ve haven’t renewed the bushes inside, which I’ll do when I have the full car back together.
With the tubes roughly in the right position and orientation, it was time to fit the bump stop mounts and Z link plates with the original bolts I removed during the strip phase. Using my photos I took when I took this apart I was able to get the right positions for everything and get the bolts in the right place and with the correct washers because, like usual, everything is slightly different. The trickiest part of putting it back together was getting the swing arms to line up with all the bolt holes but a couple of G clamps and a screw driver helped here.
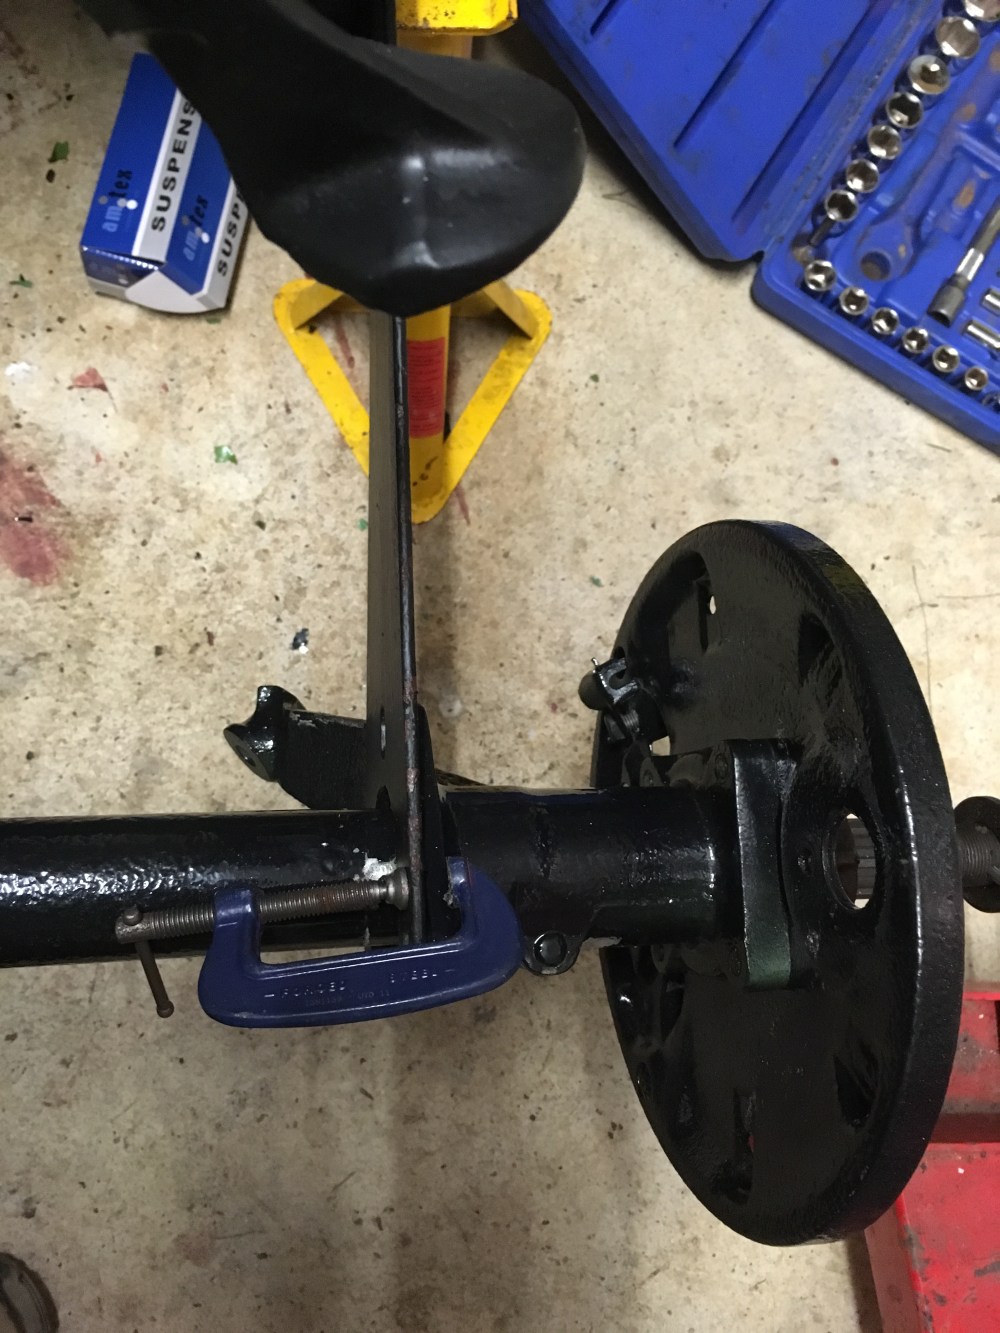
I’m using the old bolts because they are part of the car and they are perfectly serviceable for reuse. I’m still using threadlock where I can for the suspension parts, mainly for the added peace of mind but also helps keep the water out so the nut and bolt doesn’t rust together.
Next I decided to tackle the rear brakes which I left inside the brake drums as complete units but here is where I came across a small issue (might have to sort later), the rear brake cylinders had over extended while off the car so I don’t know how well the seals will cope when I refill the brake system so a quick hint would be to tie or fit an elastic band on them when you remove to stop any issues. I also found out the hard way that it’s better to fit the hand bake cables first before fitting the brake shoes. Rear brakes are pretty straight forward so they went back together pretty quickly and I’m using the old cables (stored in a bin liner) so they went back in perfectly. After a bit of copper grease on the star adjusters, the shoes were clipped in and the drums went sliding into position and the hub nuts (one new one) went back on loosely for now. I also fitted the rear wheels to give myself a sense of progress.
I also decided to refit the brake pipes after a quick blow through with the compressor (got the wrong flexible hoses so put the old ones on for now), and on went the new shock absorbers with the old bolts (had them still fitted to the old shocks in my old parts box)
At this point I decided to fill the gearbox oil, a good 17mm hex key is needed here.
Other jobs included fitting the gear linkage but will wire lock later and touching up any paint damage caused by the rebuild.
The next job was to give the input shaft and bell housing a good clean and replace the clutch bearing but as usual I bought the wrong one. 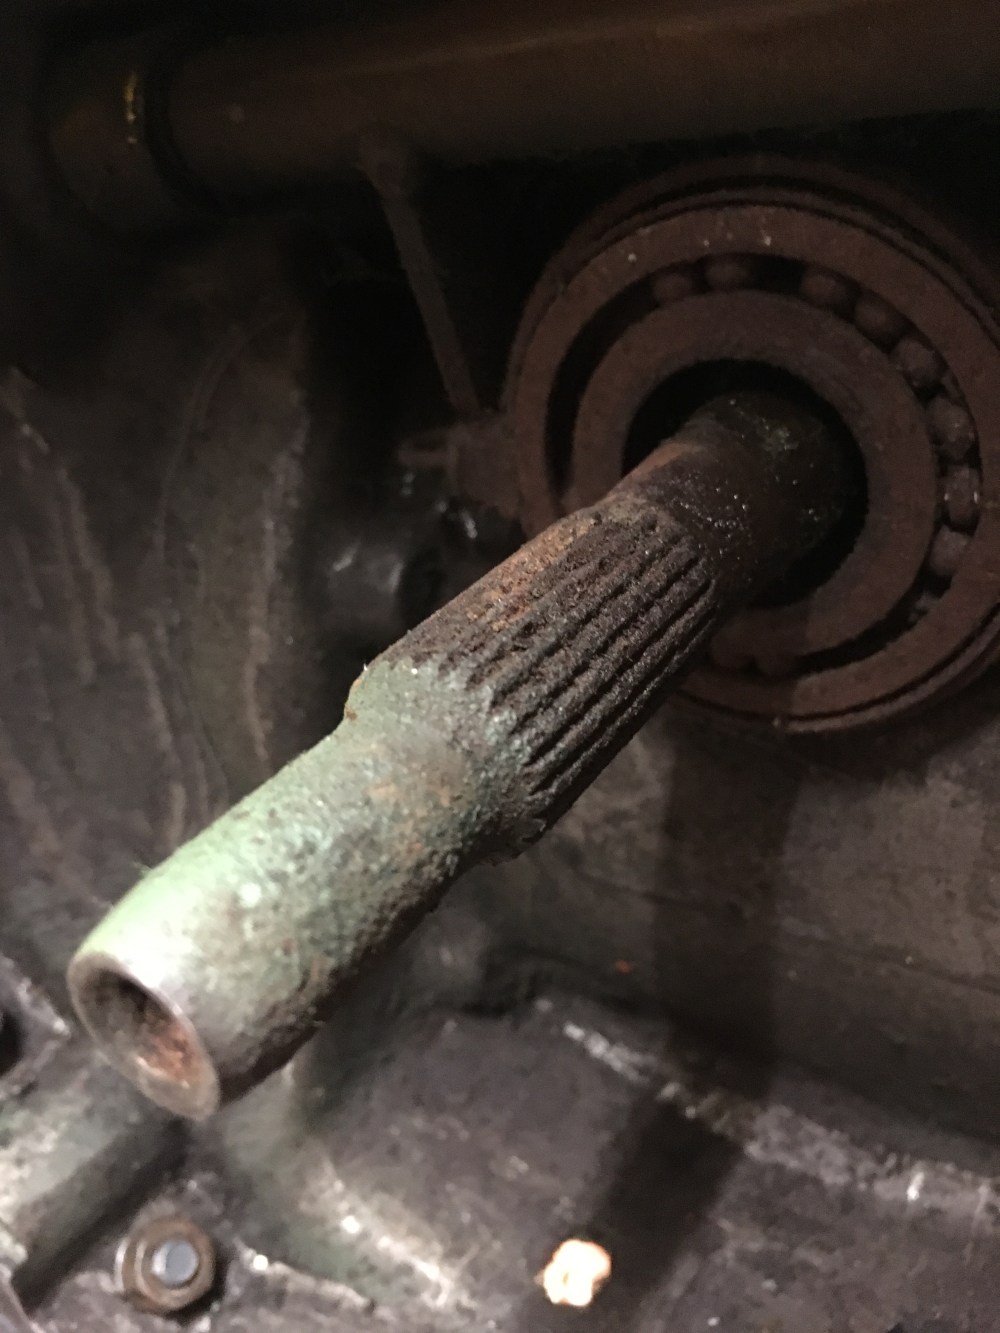
Luckily the input shaft wasn’t as rusty as first thought and cleaned up very nicely with a wire brush.
Next jobs to do will be completing the paint on the chassis ready to fit the front suspension.
